Recent Posts

Christmas Cut-Out Cookies

I have blogged many times about my grandma’s cut-out cookie recipe. It’s one of my all-time favorites, both because of the great flavor and because it makes me so nostalgic. At Thanksgiving this year, my family reminisced about my grandmother and her annual cookie-making endeavor. She didn’t just make a few batches. She made HUNDREDS of cookies. Her house was like a military operation during the first week of December. She’d bring in her sister for help — and occasionally recruit my aunt and I to help decorate. My Omi took her cookies very seriously, as they were a reflection of herself and how much she loved to cook for people.

All of that nice nostalgia aside, my sweet grandmother would also morph into a bit of a dictator around cookie decorating time. She was German, which meant she had one hell of a stubborn streak in her. It was HER way or no one’s way when it came to decorating her sugar cookies. The bells HAD TO BE yellow. The stockings HAD TO BE red. The mittens HAD TO BE blue. And so on. There was no deviation from her norm. None. And if you did, she would remove the abnormal cookie (in this case, maybe a red bell) from the pile and refuse to give it away as a gift.

She was also a stickler about how much decorating sugar was used. You were to LIGHTLY dust the cookie with colored sugar. If you dipped the cookie into the sugar, you might as well have committed murder. She would always chide, “You’re using too much sugars! Too much!”

Why my aunt and I put up with this nit picky-ness, we’ll never know. But we did it because we loved her and if she wanted all of those mittens lightly dusted with blue (and only blue) sugar, OK then. The odd thing was, my grandma was only this stubborn and picky when it came to these cookies. What she cooked or baked was, in her mind, a direct reflection of herself — and she wanted those cookies to be the best that they could be.

Every year my aunt and I laugh about the cookie decorating experiences we had together at my grandma’s house. She and I are both troublemakers and boundary-pushers by nature, so we always had fun with it. One year we put brown jimmies near the butt of a reindeer cut-out – an act that nearly got us kicked out of the house.

This year I decided to make a big batch of Christmas cookies — and to decorate them as closely to what my grandmother would have done as I could remember. I did, however, break her rule regarding the amount of decorating sugar used. I coated those babies in sugar…. dipped ’em right in! Because really, colorful cookies make better photos… and I like sugar.

Happy holidays, everyone!

Omi’s Sugar Cookies
Print Recipe

2 cups butter
2 cups sugar
2 large eggs
1 teaspoon salt
6 cups flour
2 teaspoons baking soda
1 cup sour cream
2 teaspoon nutmeg*

Beat butter and sugar. Add eggs, sour cream, and nutmeg. Add dry ingredients gradually. Chill the batter overnight or for at least 4 hours. Roll out dough and cut with cookie cutters. Bake at 350F until golden (in true fashion, my grandma didn’t give a specific baking time. I baked the cookies for about 8 minutes).

*The nutmeg definitely gives these cookies a distinct flavor. Many peoples’ comment after trying one was “wow, these are really good, but I can’t put my finger on what tastes different”. It’s the nutmeg. And you either love it or hate it. My mom is not a fan, so my grandma would always bake a separate batch of “Jeanne’s cookies” – sans nutmeg.

Omi’s Frosting
2 tablespoons shortening
1 tablespoon butter
1 teaspoon vanilla extract
1/4 teaspoon salt
5 tablespoons scalded milk
3 cups (or more) powdered sugar

Beat all ingredients together besides the powdered sugar. Gradually add the powdered sugar until you get a smooth and creamy consistency.
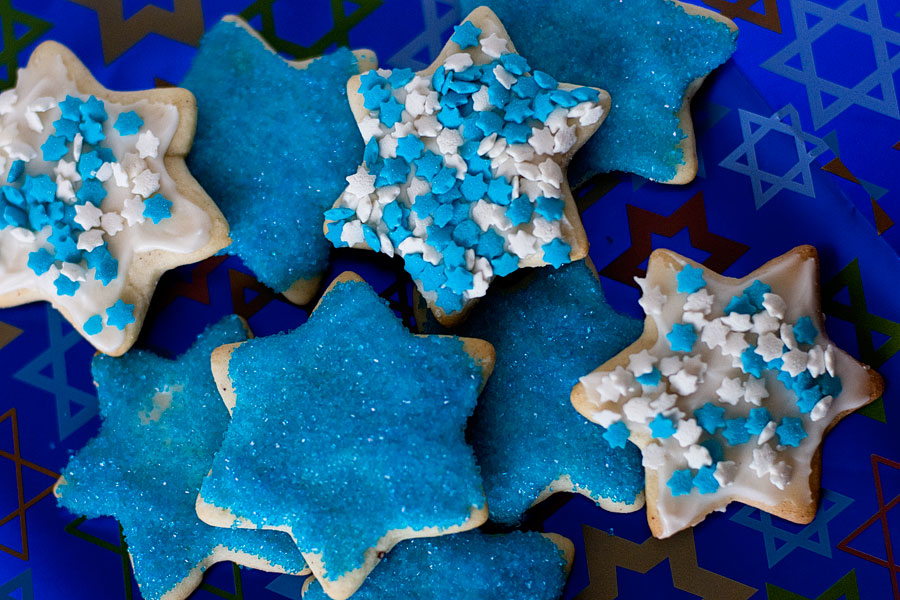
Happy Hanukkah!

Happy Hanukkah to all of my Jewish readers!

There is a cute story behind the Star of David cookies above.  My grandmother used to make hundreds and hundreds of cut out sugar cookies every holiday season. There would be Christmas trees, stockings, bells, snowmen, and oddly, Stars of David.  My family isn’t Jewish but each and every year, my grandmother would insist on making Star of David cut-outs and she would also insist on using blue sprinkles.  When I was a teenager I decided to ask her why she did this (considering that again, we’re not Jewish — and Oshkosh has a very small Jewish population).  Her response was, “Don’t be silly, they’re stars!”  She had no idea that the six-pointed blue star that she insisted on making each year was a symbol of Judaism. My grandmother was not AT ALL anti-Semitic, she just didn’t know that the shape was attached to the Jewish faith.

So from that year on, if I make my grandmother’s cut-out cookies, I always make a few Stars of David. Just because.

Brief Hiatus!


I’m away from the kitchen and in New York this week, so I won’t be around to approve comments and return emails. I’ll be back next week with a few more holiday treats, a Christmas recipe round up, and a cute photo or two of New York at Christmastime.

12 Days of Christmas: Pfeffernuesse


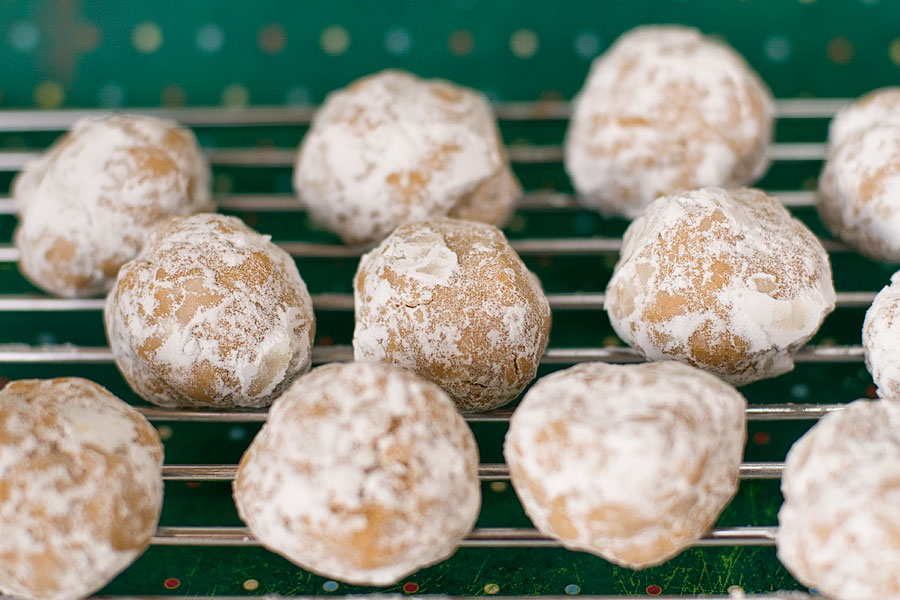
Pfeffernuesse translates to “pepper nuts” in German. I’m from Wisconsin — a state with an incredibly large number of German settlers. It always bugs me a bit when people say “I’m Irish” or “I’m German”. No, you’re American if you were born here and if your parents were born here. I do think it’s important to acknowledge and respect your heritage. My blood is probably 99% German or Swiss, so I thought I’d make a traditional German cookie for my last post of this project.

I’ll be honest, I’m not a huge fan of pfeffernuesse cookies. They’re unique and a love-them-or-loathe-them type of food. But I always try to bake a variety of treats on this blog (I can’t just make cute cupcakes ALL the time, right?!). There is no perfect way to make these cookies and every recipe you read has a slightly different twist. Some recipes require pepper. Some require cloves. Some required nutmeg and anise. Some require cinnamon. If you’re a fan of any of the ingredients listed above, give these a try!

Pfeffernuesse Cookies
Print Recipe

1/2 cup butter, softened
1/4 cup sugar
1/4 cup packed brown sugar
1/4 cup molasses
1 Tablespoon water
1 teaspoon instant coffee granules
1 egg
1 teaspoon anise extract
1/2 teaspoon baking soda
1/2 teaspoon ground cinnamon
1/4 teaspoon ground white pepper
1/4 teaspoon salt
2-1/2 cups all-purpose flour
+ powdered sugar for dusting

1. Combine butter, sugar, brown sugar, and molasses in large bowl; beat at medium speed, scraping bowl occasionally until creamy.
2. Combine water and coffee granules in small bowl; stir until dissolved. Add coffee mixture and all remaining ingredients except flour; continue beating until well mixed. Reduce speed to low; add flour, beat until well mixed. Cover and refrigerate for 30 minutes.
3. Heat oven to 350F. Roll dough into teaspoon-sized balls and place on parchment-lined baking sheet. Bake for 8-10 minutes or until slightly browned.
4. Allow to cool for a few minutes; roll warm cookies in powdered sugar and cool completely on wire rack.

12 Days of Christmas: Stained-Glass Sugar Cookies


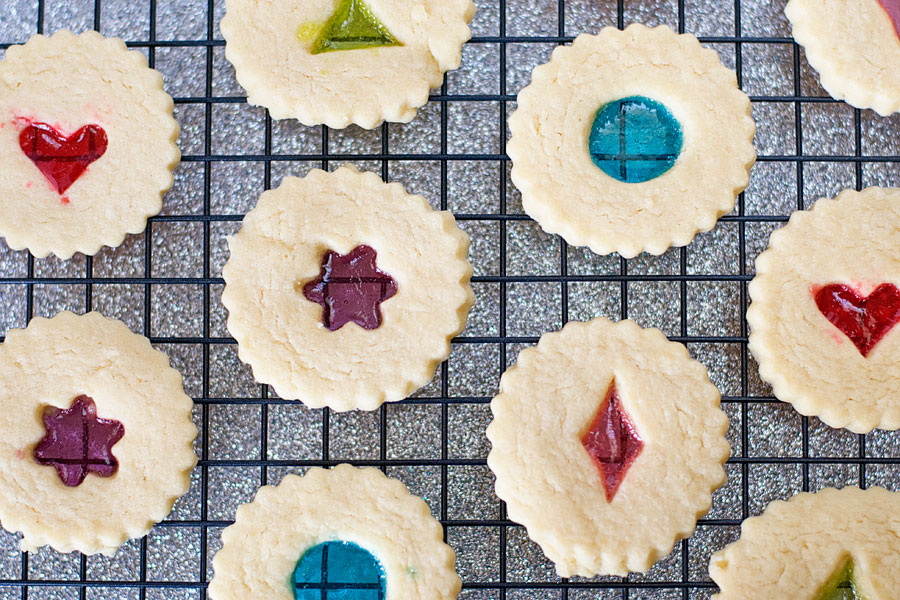
Stained-glass cookies have been on my to-bake list FOREVER. The concept is awesome but I’ll admit, I was intimidated at the thought of making them. I’m not great with making intricate cookies, much less cookies that involve melted sugar in the middle. Eeep! I was reading Everyday Food last month and this was one of the featured Christmas cookie recipes. If it’s a Martha recipe, it’s gotta be good. Say what you will about her as a person, her brand and her recipes are flawless. I decided to give these a try and they weren’t nearly as difficult as I was expecting. There are a few things I would do differently next time and I included those notes in the recipe below.

Stained-Glass Sugar Cookies
Recipe source: Everyday Food
Print Recipe

3 cups all-purpose flour, plus more for rolling
3/4 teaspoon baking powder
1/4 teaspoon fine salt
1 cup unsalted butter, softened
1-1/4 cups sugar
4 large egg yolks
1 Tablespoon vanilla extract
Very finely crushed hard candy (I used Jolly Ranchers), 1 cup total

1. In a medium bowl, whisk together flour, baking powder, and salt. In a large bowl, beat butter and sugar on medium-high until light and fluffy (about 3 minutes). Add egg yolks and vanilla and beat to combine. With mixer on low, gradually add flour mixture and beat to combine.
2. Form dough into 2 disks, wrap in plastic, and refrigerate 30 minutes.
3. Preheat oven to 350F.
4. Working with one disk at a time, roll out dough between floured parchment paper to 1/8-inch thickness. Stack dough in parchment on a baking sheet; refrigerate until firm (about 30 minutes).
5. With a 2-1/2-inch circle cutter, cut out dough. Place cookies 1 inch apart on baking sheets. With a 1-inch star cutter, cut out dough in center of each cookie. Bake until cookies are pale but set, 8-10 minutes, rotating sheets halfway through. [This step works best when the dough is COLD – the warmer is gets, the more difficult it becomes to cut out the shapes; I used a cookie cutter set made for linzer cookies; cut the circle out first THEN cut out the small center shape, it just works better that way]
6. Remove sheets from oven; fill cutouts with crushed candy. Bake until cookies begin to brown at edges and candy is melted, about 3 minutes. [Be careful to fill only the cutouts and to not allow any candy to overflow onto the cookie surface, otherwise it will melt and stain the cookie — as you can see in parts of my cookies! No perfection here, folks!]
7. Let cool completely on sheets on wire racks.