Recent Posts

French Toast and Bacon Cupcakes
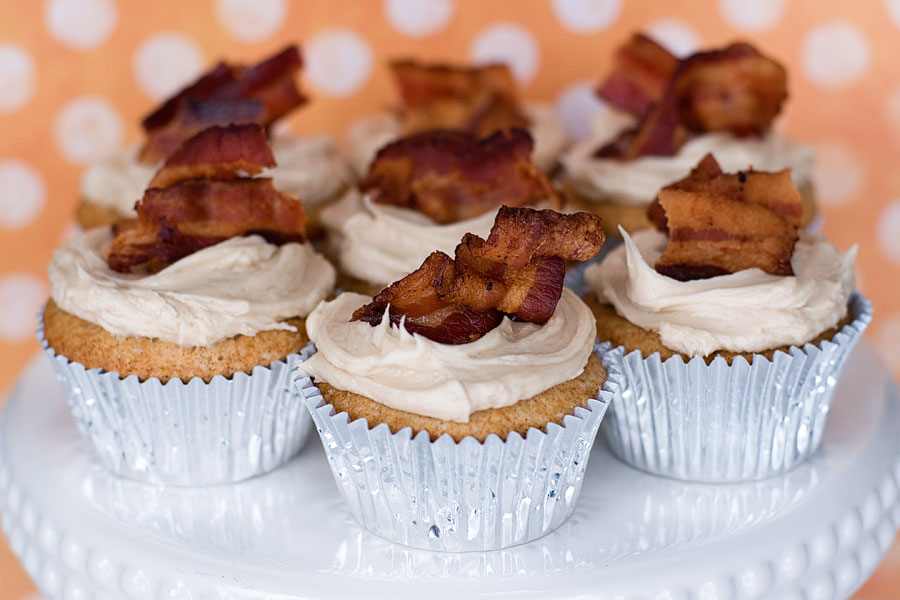
Happy 2013, everyone! Most blogs are starting to post recipes with lighter, healthier foods. Nah. Not this blog. French toast cupcakes are up next! French toast is my all-time favorite breakfast food. What’s not to like? It’s a carbohydrate overload that can keep you full the entire day. Perfection. I’ve wanted to make this recipe for a while and decided to try it when I was home over winter break — so my Dad could cook the bacon for me. He’s got a knack for producing perfect, crispy bacon. And the crispier the bacon the better for these cupcakes.

French Toast and Bacon Cupcakes
Recipe source: The Busty Baker
Print Recipe

1-1/2 cups all-purpose flour
1-1/2 teaspoons baking powder
1/2 teaspoon ground cinnamon
1/4 teaspoon salt
1 cup sugar
1/2 cup unsalted butter, melted and then cooled
2 eggs
1 teaspoon maple extract
1/2 cup milk
10-12 slices bacon

1. Preheat oven to 350F and line baking pan with paper liners.
2. Cook bacon in batches by prefered method until browned, but still slightly flexible. Soak up any extra oil on paper towels and set aside to cool. Once bacon is cooled enough to handle, cut a couple slices of bacon into inch-long pieces. This will be the decoration on top of the cupcake, so make as many as you think you’ll need. Set aside. Chop or tear the remaining bacon into tiny pieces. Set aside. [I used REALLY crispy bacon, as I found it was easier to tear and just tastes better with the icing]
3. In a small bowl, mix together flour, baking powder, cinnamon and salt.
4. In a large bowl, whisk together butter, sugar and eggs until smooth. Whisk in maple extract. Alternately whisk in flour mixture and milk, making three additions of flour mix and two of milk, beating until smooth. Fold in small bacon pieces. Mix until evenly distributed throughout batter. [I did not add the bacon directly into the batter; feel free to omit this step, the cupcakes still turned out great!]
5. Scoop batter into prepared pan and bake 20-25 minutes until golden brown and tops spring back when lightly touched. Let cool in pan on a rack for 10 minutes, then remove from pan and cool completely.

Maple Buttercream
2 cups confectioner’s sugar
3/4 cup unsalted butter, at room temperature
2 tablespoons maple syrup
1/2 teaspoon maple extract
Pinch of salt

1. In a bowl with an electric mixer, beat butter until light and fluffy. Add maple syrup, maple extract, and salt, and beat until well combined. Add confectioner’s sugar, half cup at a time, and beat until smooth and fluffy, about 5 minutes.
2. Frost or pipe onto cooled cupcakes. Top with inch-long bacon pieces.
Copy Cat Cinnabons

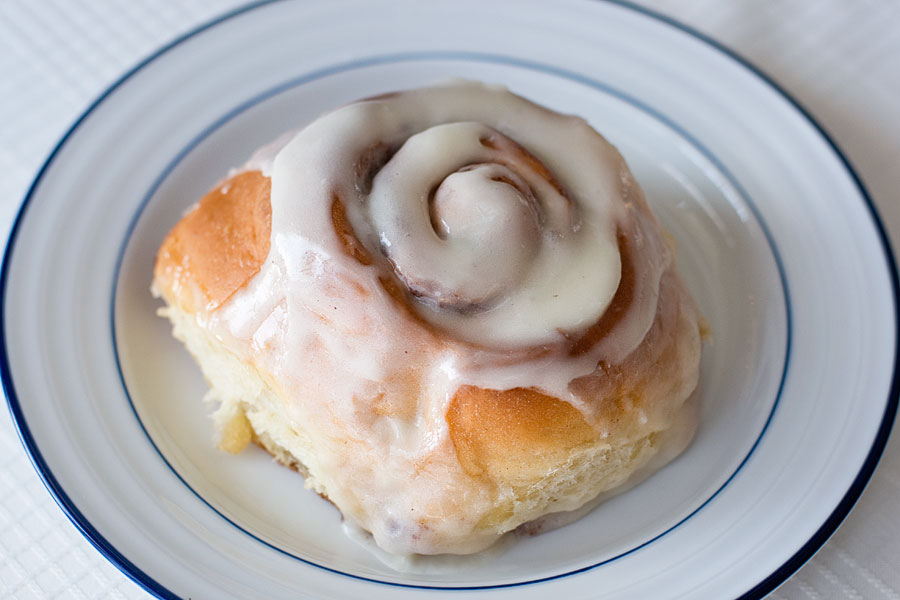
One of my new year’s resolutions for 2012 was to make cinnamon rolls from scratch. I completed this task yesterday – on December 30th. Nothing like waiting until the last minute, right?! Truth be known, breads and rolls intimidate me. I’m not great with yeast, my last attempt at cinnamon rolls was a comical disaster, and I was skeptical that I could get these babies right. But I did!
The best part of any mall or airport is Cinnabon. I mean, seriously. They are one of man’s most delicious creations. I found a Cinnabon copy cat recipe in Food Network magazine years ago. I ripped it out and saved it — and finally got around to giving the recipe a try. It was worth the 4 hours of time and all of the effort. Trust me. Let me say that these do not taste exactly like Cinnabons (because they are not Cinnabons), but it’s a pretty close homemade version.

And lastly, I want to say happy new year to all of my readers. I hope you have a safe and fun New Year’s Eve and a happy and healthy 2013. I can’t wait to bake more goodies and share them with you.

Copy Cat Cinnabons
Recipe source: Food Network Magazine, November 2009
Print Recipe

For the dough:
1 cup whole milk
1 1/4-ounce packet active dry yeast
1/4 cup plus 1/4 teaspoon granulated sugar
4 Tablespoons unsalted butter, melted, plus more for the bowl
1 large egg yolk
1-1/2 teaspoons vanilla extract
2-3/4 cups all-purpose flour, plus more if needed
3/4 teaspoon salt
1/2 teaspoon freshly grated nutmeg

For the filling:
All-purpose flour for dusting
12 Tablespoons unsalted butter, softened, plus more for the pan
1/2 cup granulated sugar
3 Tablespoons ground cinnamon

For the glaze:
2 cups powdered sugar
1/3 cup heavy cream
4 Tablespoons unsalted butter, melted

1. Make the dough: Warm the milk in a medium saucepan over low heat until it reaches 100 degrees. [I used a meat thermometer to measure the temp — it’s important to do this because if it’s too hot, it will kill the yeast] Remove from the heat and sprinkle in the yeast and 1/4 teaspoon sugar (don’t stir). Side aside until foamy – about 5 minutes. Whisk in the melted butter, egg yolk, and vanilla.

2. Whisk the flour, the remaining 1/4 cup sugar, the salt and nutmeg in the bowl of a stand mixer. Make a well in the center and pour in the yeast mixture. Mix on low speed with the dough hook until thick and slightly sticky. Knead on medium speed until the dough gathers around the hook – about 6 minutes. [I had to add 2-3 Tablespoons more flour at this point because my dough wasn’t firm enough]

3. Remove the dough and shape into a ball. Butter the mixer bowl and return the dough to the bowl, turning to coat with butter. [I used non-stick spray for this] Cover with plastic wrap and let rise until doubled – about 1 hour, 15 minutes. [I turned my dryer on and placed the bowl on top of the dryer; this creates a low heat that helps the dough to rise]

4. Roll out the dough on a lightly floured surface into a 12-inch by 14-inch rectangle with the longer side facing you. Spread with the softened butter, leaving a 1/2-inch border on the far long edge. Mix the sugar and cinnamon; sprinkle over the butter. Brush the unbuttered far edge with water. Roll the dough away from you into a tight cylinder and press on the long edge to seal. Cut the cylinder into 6 equal-sized buns.

5. Butter a 9×13-inch baking pan; place the buns cut-side down in the pan, leaving space between each. Cover with plastic wrap and let rise until doubled – about 40 minutes. Preheat oven to 325F.

6. Bake the buns until golden brown – about 35 minutes. Cool in the pan 15 minutes. Meanwhile, make the glaze: whisk the powdered sugar, cream, and melted butter in a bowl. Top the buns with glaze while still warm.

Makes 6 very large cinnamon buns.
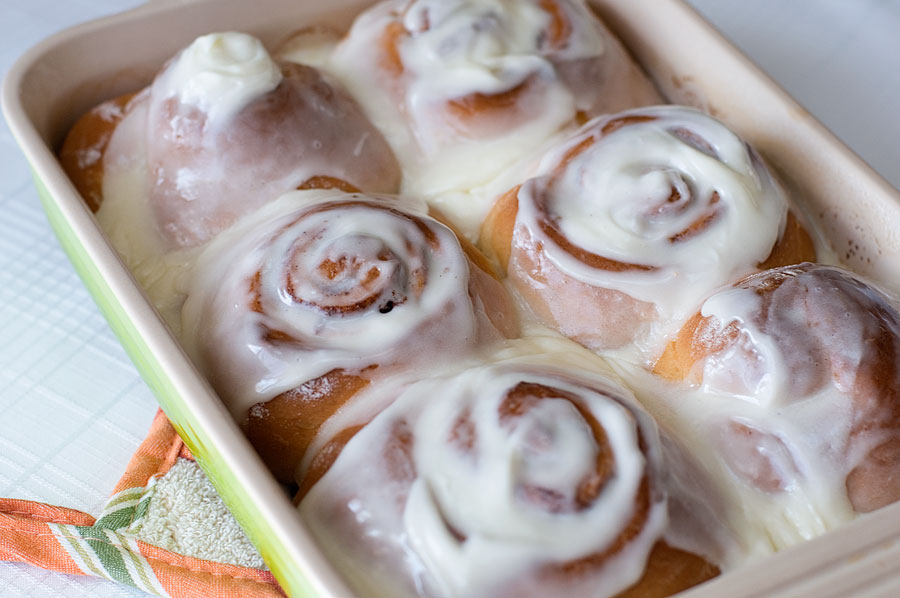
And just so you don’t think everything looks perfect, I present you with this. My pan of very un-perfect, yet totally delicious, cinnamon rolls. Don’t be frustrated if they come out of the oven looking weird and not totally uniform (like that bun waaaay in the back on the left…).

Merry Christmas!

Merry Christmas to all of my wonderful blog readers! I hope you have a safe and happy holiday — and an amazing 2013!

Gingerbread Men


I’m back from my hiatus! Finals are over and I finally have time to start baking again! I don’t have enough time to bake very many Christmas goodies, but I had to do something. I’ve wanted to make gingerbread men for a few years now. (Sorry to report that there are no gingerbread women. . . next time!) These cookies are not perfect. Many of them have cracks and many have spots of flour left over from rolling out the dough. I get a lot of comments from my blog readers saying, “oh, I could never make anything look as good as you do!” Yes you can! And believe me, my creations are nowhere near perfect. Embrace the messy and the imperfections. They are just cookies. The people you make them for will love the treats no matter what.

I hope you’re all having a great holiday season. I’m guessing I’ll be able to post more over the next couple weeks, as I’m on winter break.

Gingerbread Men
Recipe source: Taste of Home
Print Recipe

1/2 cup butter, softened
3/4 cup packed dark brown sugar
1/3 cup molasses
1 egg
2 Tablespoons water
2-2/3 cups all-purpose flour
2 teaspoons ground ginger
1 teaspoon baking soda
1/2 teaspoon salt
1/2 teaspoon each ground cinnamon, nutmeg, and allspice
1 tub store-bought vanilla icing

1. In a large bowl, cream butter and brown sugar until light and fluffy. Beat in the molasses, egg, and water.
2. Combine the flour, ginger, baking soda, salt, cinnamon, nutmeg, and allspice; add to creamed mixture and mix well.
3. Divide dough in half. Refrigerate for 30 minutes or until easy to handle.
4. Preheat oven to 350F. On a lightly floured surface, roll out each portion of dough to 1/8 inch thickness. Cut with a floured cookie cutter. Place 2 inches apart on parchment-lined baking sheets. Reroll scraps. [note: even after refrigeration, the dough will be soft – don’t let this worry you!]
5. Bake for 8-10 minutes or until edges are firm. Remove to wire racks to cool completely.

For decorating:
Place the icing in a ziploc bag and snip the corner to create a piping bag. Pipe icing onto each cookie – you can pipe eyes, a smile, a nose, anything you’d like. Decorate the gingerbread men with small candies or sprinkles. I used small round candies for the buttons. Mini M&Ms would be a great choice!

From Tortes to Torts


You know you’re a bit of a geek when you pair baking and law together to make something tasty. As I may have mentioned before, I started law school back in August. Law school is INTENSE and finals are rapidly approaching, so I will be taking a little hiatus from this blog! I hope to make a few Christmas-related treats after finals finish, but I make no promises.

Wikipedia defines a torte as “a rich, multilayered cake that is filled with buttercreams, mousses, jams, or fruits” and a tort as “a civil wrong.” I combined the two for today’s post!

Because I’ve been consumed with learning about torts (negligence and battery and assault, oh my!), I went the semi-homemade route for this torte. I just don’t have the time or energy to go full-blown homemade. The cake layers are from a box mix but the frosting is homemade chocolate buttercream. Hope you all had a great Thanksgiving and I’ll be back in December!

12-Layer Torte
Print Recipe

For the cake…
2 boxes yellow cake mix
2 cups water
1 cup vegetable oil
8 eggs
2 instant vanilla pudding mixes
12 8″ pie tins (I used the cheap disposable ones from the grocery store – so much easier!)

1. Preheat oven to 350F.
2. Combine all of the ingredients and mix with an electric mixer until smooth.
3. Spray your disposable pie tins with non-stick spray.
4. Scoop 1/2 cup of batter into each pan and spread out evenly with a knife.
5. Bake each cake (I was able to fit four into my oven at once) for 12-14 minutes. Something to note: because these cakes are THIN, watch them carefully! Oven temperatures may be off, your oven may have hotspots, etc — so watch the cakes to be sure they don’t burn.
6. Remove from oven and allow to cool on wire racks. Repeat the process above until you have 12 thin cakes.

For the chocolate frosting…
Recipe source: Savory Sweet Life

* Note! I made two batches of this frosting, just to be sure I’d have enough to cover the entire cake and all of its layers. I ended up with plenty of extra frosting. You could make a single batch to start with to see how it goes – but be prepared that you may need to make two batches.

1 cup unsalted butter, softened
3-1/2 cups powdered sugar
1/2 cup cocoa powder
1/2 teaspoon salt
2 teaspoons vanilla extract
4 Tablespoons milk or heavy cream

1. Cream butter in a mixer with the paddle attachment on medium speed. Turn off the mixer. Sift 3 cups powdered sugar and cocoa into the mixing bowl. Turn your mixer on the lowest speed (so the dry ingredients do not blow everywhere) until the sugar and cocoa are absorbed by the butter. Increase mixer speed to medium and add vanilla extract, salt, and milk/cream and beat for 3 minutes. If your frosting needs a more stiff consistency, add a little more sugar. If your frosting needs to be thinned out, add additional milk 1 tablespoon at a time.

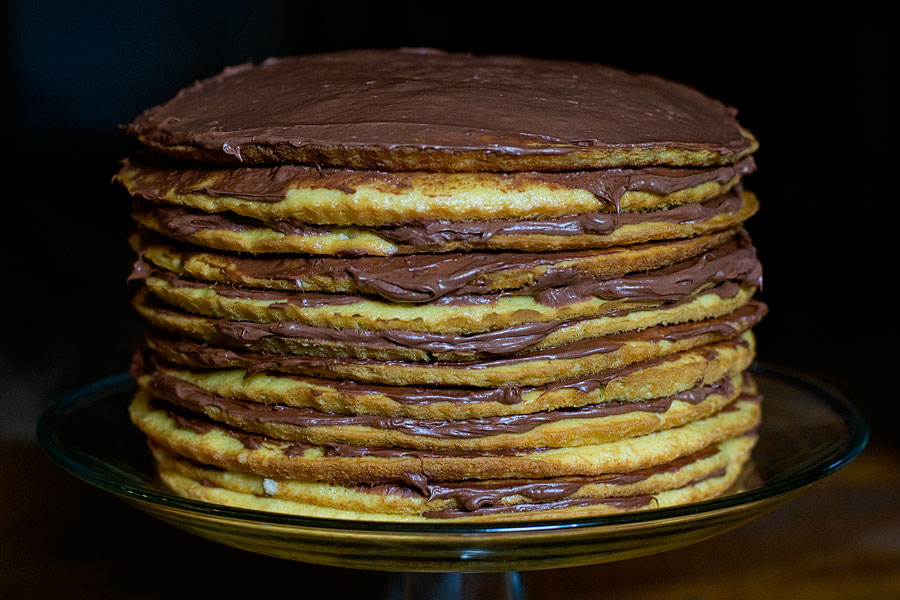
2. Stack your cake layers, spreading a thin layer of chocolate frosting between each layer. Once you’ve stacked all 12 layers, frost the outside of the torte and decorate as you please. Here’s what it looked like before frosting the outside: