Recent Posts

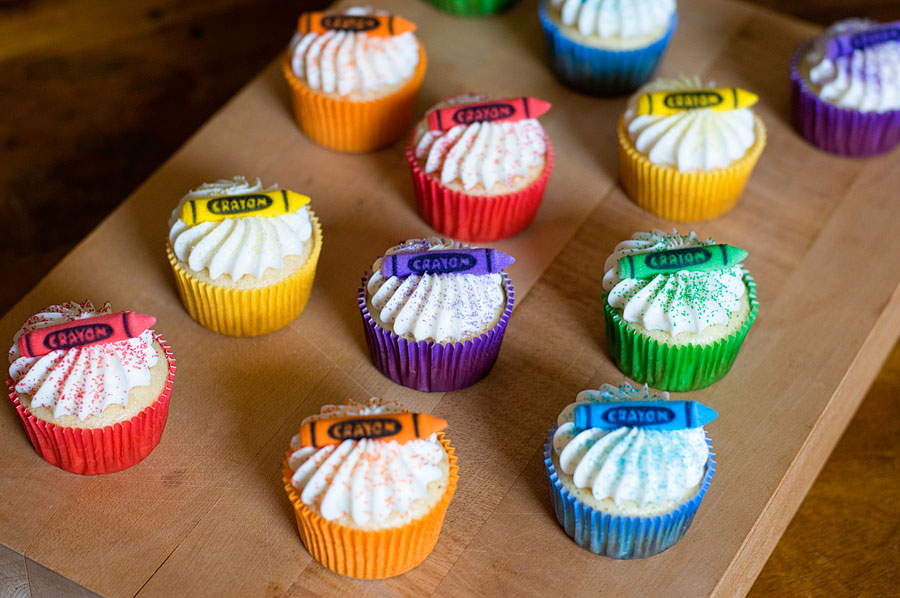
Crayon Cupcakes

It’s the day after Labor Day, which means that pretty much every kid in the country is back in school. *sad trombone* I never liked going back to school and I used to hate autumn because I’d associate it with heading back to school. I’m still in school – and I like the first few days of a new school year. Nothing is too stressful yet. I am gleeful over my new highlighters and notebooks. It’s nice to see everyone and ask how their summers were. The first few days are great. But then the stress hits and I’m all like, “Noooo! Take this back! I don’t want this anymore! Make it stop! STAAAAAHP!” [threw in my Wisconsin accent in that sentence just for fun]

But cupcakes make everything better! I found these pressed sugar crayons at a local shop here in Milwaukee called Cook’s. Cook’s has every baking supply you’ll ever need. It is a fantastic shop. Hope you’re all enjoying the first few days of this new season.

Crayon Cupcakes
Print Recipe

1 box cake mix of your choosing
Various paper liners
Buttercream icing or vanilla store-bought icing
Pressed sugar crayons [if you can’t find these at your local baking shop, do a Google search!]

There isn’t much to instruct here. Make the cupcakes according to box directions and frost with an icing of your choosing. I used sprinkles to give the cupcakes a little more dimension — and I topped them with the pressed sugar crayons. That’s it!
Princess Birthday Cake


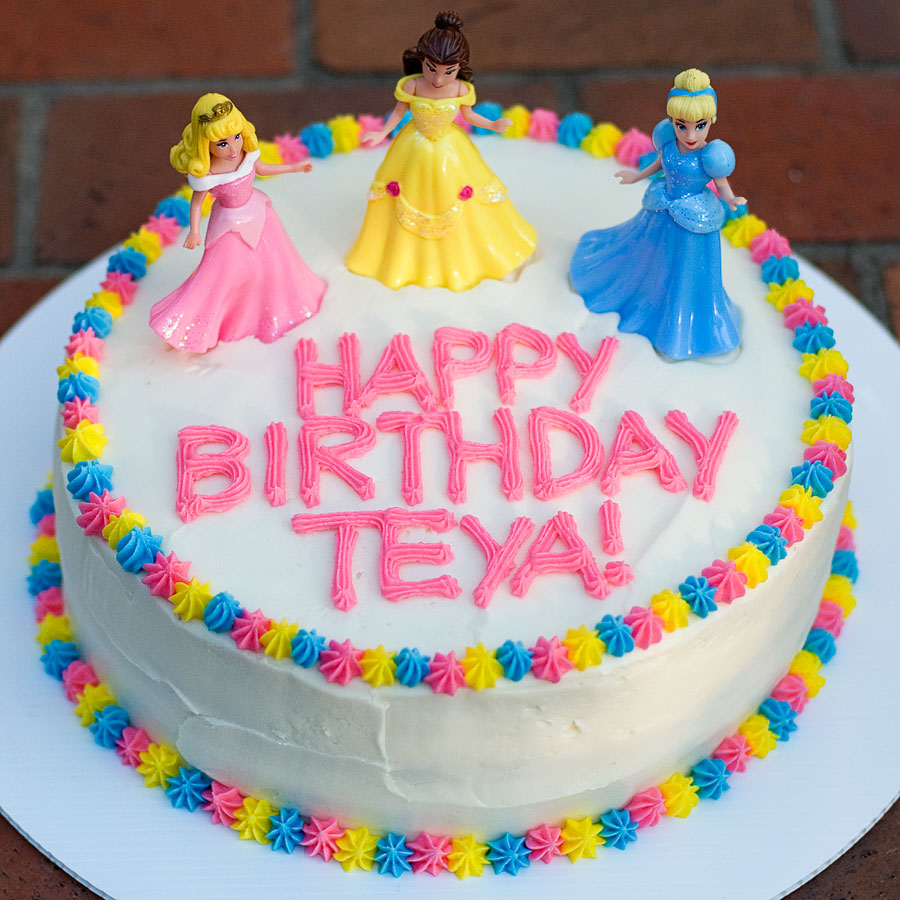
I’ve been on a Disney Princess kick this summer. I made Disney princess cupcakes earlier in the summer, and when one of my favorite little girls turned three, I made her a Disney princess cake. Here’s the rundown on how I made this.

Disney Princess Cake
Print Recipe

3 boxes white cake mix (plus required eggs + oil)
10″ cake pan(s) (I made a 10″ cake, but you can go smaller or larger)
Pink, yellow, and blue food coloring (I used Wilton gel colorings)
1 batch of white buttercream icing (if you really love frosting, make 1-1/2 batches)
Disposable pastry bags
A small star tip
Disney princess figurines (I bought a set in the toy department at Target)

1. Make three batches of white cake batter. Dye one batch pink, one yellow, and one blue — for a three-layer cake. Bake the 10″ cakes according to box directions. Use the baking time for a 9″ cake on the back of the box as a guide – though you may need to bake the 10″ cake longer.
2. While the cakes are baking, make your batch(es) of buttercream icing.
3. Allow the three cakes to cool completely. Once cool, remove the “dome” on each with a large knife, so that the cakes are level.
4. Assemble the layers any way you’d like, with frosting between each layer. Frost the outside of the cake with white icing.
5. Dye the remaining icing pink, yellow, and blue. Pipe a decorative border around your cake — and a birthday message for the recipient.
6. Add the Disney princesses of your choosing as a cake topper. I had to place a lollipop stick underneath to anchor each princess so that they would stand upright on the cake.

I went with Cinderella, Belle, and Aurora because I liked the pink/yellow/blue color combination — and Cinderella is one of Teya’s favorites. But you can use any princesses and colors that you’d like.

Blue Moon Ice Cream Cupcakes

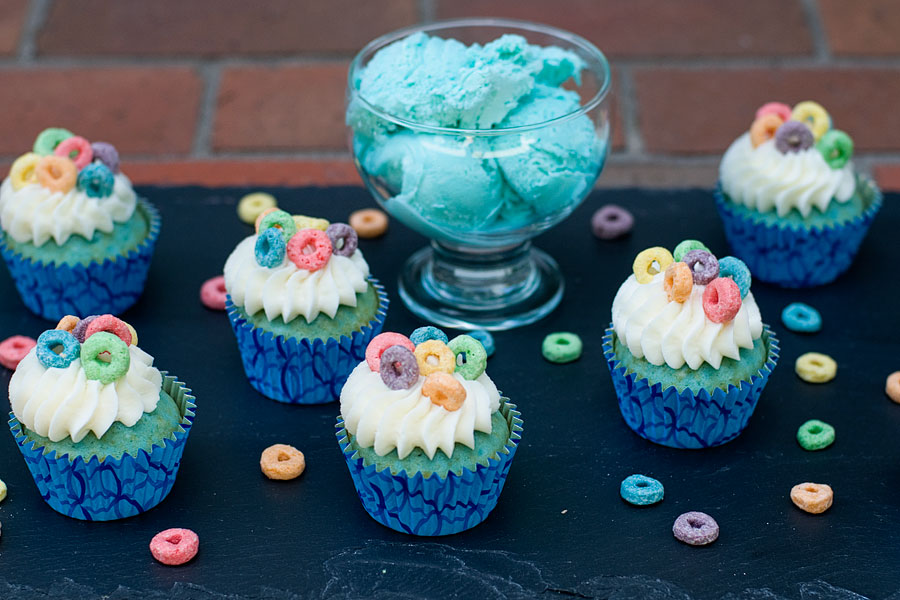
If you read my post from yesterday you may have been wondering, “what in the world is blue moon ice cream?” It’s not ice cream made with the beer (though that could be tasty). Blue Moon is an ice cream flavor that is extremely popular in the upper midwest. The fun, and slightly maddening, thing about Blue Moon ice cream is that no one agrees on what it tastes like. Wikipedia lists the following guesses: “fruit, Fruit Loops, orange, pineapple, lemon, cherry, raspberry, cantaloupe, honeydew, peach, licorice, pistachio, coconut, almond, burnt almond, nutmeg, cloves, ginger, cardamom, buttercream, custard, chocolate, vanilla, marshmallow, bubble gum, Blue Curaçao, Crème de cacao, Amaretto, cake frosting, cotton candy, cola, and various combinations of these flavors.”

Intriguing, right? I think it tastes like fruit loops, with undertones of orange or citrus. Side note: that may have been the silliest sentence I’ve ever written. If you live in the upper midwest, consider yourself lucky and go try Blue Moon if you haven’t! If you live elsewhere, keep your eye out for this unique flavor.

Blue Moon Ice Cream Cupcakes
Recipe source: wineandglue.com
Print Recipe

1 box white cake mix (plus required eggs + oil)
1-1/2 Tablespoons almond extract
1/2 Tablespoon orange liquor
A batch of buttercream icing (or you can use vanilla store-bought icing)

1. Preheat oven to 350F and line muffin tins with paper cups.
2. Make cake batter according to box directions — adding in the almond extract and orange liquor.
3. Fill muffin cups 2/3 full and bake according to box directions. Allow to cool completely on wire racks.
4. Frost with homemade buttercream or store bought icing. Garnish with Fruit Loops.

Ice Cream Cone Cookies


Summer is winding down and signs of autumn are starting to pop up. But I’m going to cram one more week of summer treats on my blog! Few things make me more nostalgic than an old-fashioned ice cream shop. I love ice cream and I really do think it’s one of the world’s most perfect creations. What is your favorite flavor? I love mint chip, cookies ‘n’ cream, or butter pecan.

I’ve seen countless variations of the ice cream cut-out cookie floating around on the internet and on Pinterest. I took my inspiration from here there and everywhere to make these. I hope you’ve had a wonderful summer!

Ice Cream Cone Cookies
Cookie recipe source: Bake at 350
Print Recipe

3 cups all-purpose flour
2 tsp baking powder
1 cup sugar
2 sticks (salted) butter, cold & cut into chunks
1 egg
3/4 tsp pure vanilla extract
1/2 tsp pure almond extract

1. Preheat oven to 350.
2. Combine the flour and baking powder, set aside. Cream the sugar and butter. Add the egg and extracts and mix. Gradually add the flour mixture and beat just until combined, scraping down the bowl, especially the bottom. [the dough will be crumbly; not to worry, just knead it together a bit with your hands]
3. Roll on a floured surface to about 1/4″ to 3/8″ thick, and use a large ice cream cone cookie cutter. Place on parchment lined baking sheets (tip: freeze the cut out shape on the baking sheet for 5 minutes before baking) and bake for 10-12 minutes.
4. Let sit a few minutes on the sheet, then transfer to a cooling rack.

White Royal Icing
Recipe source: Annie’s Eats

4 cups powdered sugar, sifted
2 Tablespoons meringue powder
5 Tablespoons water

1. Combine all ingredients in the bowl of a stand mixer fitted with the paddle attachment.
2. Mix on low speed until the sheen has disappeared and the icing has a matte appearance (about 7-10 minutes).
3. Transfer the contents of the mixing bowl to an air-tight container.

Chocolate Royal Icing (just for the chocolate cones)
3-3/4 cups powdered sugar
1/3 cup cocoa powder
7 Tablespoons water
3 Tablespoons meringue powder

1. Mix all ingredients using a stand mixer fitted with the paddle attachment.
2. Transfer icing to an air-tight container.
3. Add water, small amounts at a time, until you’ve reached a consistency appropriate for piping.

My Instructions

  • First, if you have never made cookies involving royal icing, I’d highly recommend this tutorial from Annie’s Eats or visit Bridget’s blog, Bake at 350, for all the tips and tricks you’ll need.
  • I’m not going to re-invent the wheel, so please refer to the links above regarding outlining and flooding. You will need small round pastry tips, disposable bags, and plastic bottles for flooding. Again, Annie’s tutorial linked above takes you through all of this.
  • I made a couple batches of the white royal icing for these and divided the icing into various tupperware containers. You’ll need just one batch of the chocolate royal icing. In fact, you could even cut that recipe in half — as you won’t use a ton of it.
  • I wanted to make vanilla, strawberry, chocolate, mint chip, and blue moon cones. You can do whatever flavors you’d like!
  • I used Wilton gel dyes — you’ll need pink, green, blue, and brown. There is no great science to this — just use trial and error to get the color that you’re looking for. I used brown gel coloring for the cones — it turned out more tan than brown, so it worked out well.
  • If you want to add sprinkles to your cones, do so after you let the flooded icing sit for just a few minutes. If you sprinkle the cones right away, the colors might bleed because the icing will be so wet.
  • And finally, I just want to say that I’m not great at decorating with royal icing — but I still do it because it’s so cute! Don’t be hesitant to try this way of decorating cookies. I’m shaky with my outlining and my flooding shows some lumps and bumps, but it’s okay. They’re just cookies. Enjoy them!

Stuff & Things


Hey everyone! Taking a tiny break from posting baked goods to bring you a post filled with this, that, and other miscellaneous things. I’ve gotten a lot of emails regarding the things mentioned below, so I thought it might be helpful to write a post addressing some of the issues. Plus a few other things sprinkled in. No pun intended. :)

  • I don’t, nor will I ever, accept advertising for this blog. I’m not trying to be difficult about it, I just don’t want ads and I don’t want the pressure of having to blog more than I already do — or worry about site traffic.
  • I’m not a bakery, meaning that I don’t have a shop and cannot bake and ship to you. I can’t make your kid’s birthday cake, I can’t do special orders, etc. I am more than happy to answer questions you may have and send encouragement — if you’d like to try to make something yourself. You can do it!
  • Another thing I’m not? A recipe writer. I bow down to those that write their own recipes, but that is not me. I have a file folder of recipes (from Pinterest, my favorite blogs, etc) that I’d like to try. I try them. If they work out and taste delicious, I blog about it. That’s how it goes around here.
  • I also get a lot of questions about how to start your own baking blog. I don’t have a formula to follow. Just jump in and do it — knowing that it will suck in the beginning. Meaning you won’t know what you’re doing, your photos will not be the best, and you’ll screw up. Get comfortable with being uncomfortable (that’s also the motto of law school, by the way… ha!). Make friends with other food bloggers. Most of them are amazing, generous, wonderful people. Ask questions. But know that you will improve if you stick with it. I cringe at some of the photos I posted 5 years ago when I started this blog. Cringe. But I leave them up because it shows progress — and it’s important to show people that you’re not perfect. Even now I think that some of my current photos suck. I have off days. Things don’t always go according to plan. It’s happens.
  • I just started my second year of law school (first day of school is today actually!), so I may not be posting quite as much as I did over the summer. I have some cute Halloween and Christmas goodies planned though. Fall is my favorite time of year, so I’m going to try to blog as much as I can.
  • And finally, thank you all for the feedback, emails, and comments. I love my readers and I hope that you continue to enjoy this blog!