Recent Posts

Brown Butter Rolo Toffee Cookies
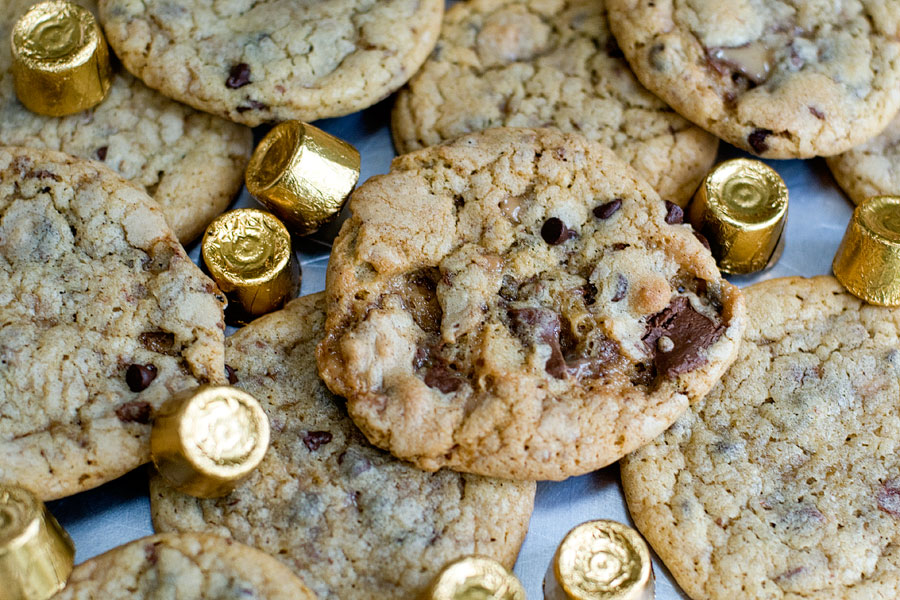

My mom, culinarily speaking, is obsessed with two things: Rolos and anything having to do with toffee. This recipe popped up on Pinterest and within 5 minutes, I had it printed out and a grocery list made for the required ingredients. I made these for my mom and she loved them. The brown butter is fantastic (and why wouldn’t it be? BrownButter.) — it gives a nutty flavor to the cookies without having to use nuts (which is a definite plus in my book).

Brown Butter Rolo Toffee Cookies
Recipe source: damndelicious.net
Print Recipe

12 tablespoons unsalted butter
2 cups all-purpose flour
1/2 teaspoon baking soda
1/2 teaspoon salt
1/2 cup sugar
1/2 cup brown sugar, packed
1 teaspoon vanilla extract
2 large eggs
1/2 cup toffee bits
1/4 cup miniature chocolate chips
16 Rolos, unwrapped and quartered

1. Preheat oven to 350 degrees F. Line a baking sheet with parchment paper.
2. Melt butter in a medium saucepan over medium heat. Cook, whisking constantly, until the foam subsides and the butter begins to turn a golden brown, about 3 minutes. The butter will start to smell nutty. Once this happens, remove from heat.
3. In a medium bowl, combine flour, baking soda and salt.
4. In the bowl of an electric mixer fitted with the paddle attachment, beat browned butter and sugars on medium-high until well combined. Beat in vanilla and eggs, one at a time, until well combined. Gradually add flour mixture to sugar mixture at low speed, beating just until incorporated.
5. Gently fold in toffee bits, chocolate chips and Rolos.
6. Drop tablespoons of batter onto prepared baking sheet. Place into oven and bake until edges are golden brown, about 7-8 minutes. Remove from oven and cool on a wire rack.

Makes a couple dozen cookies.
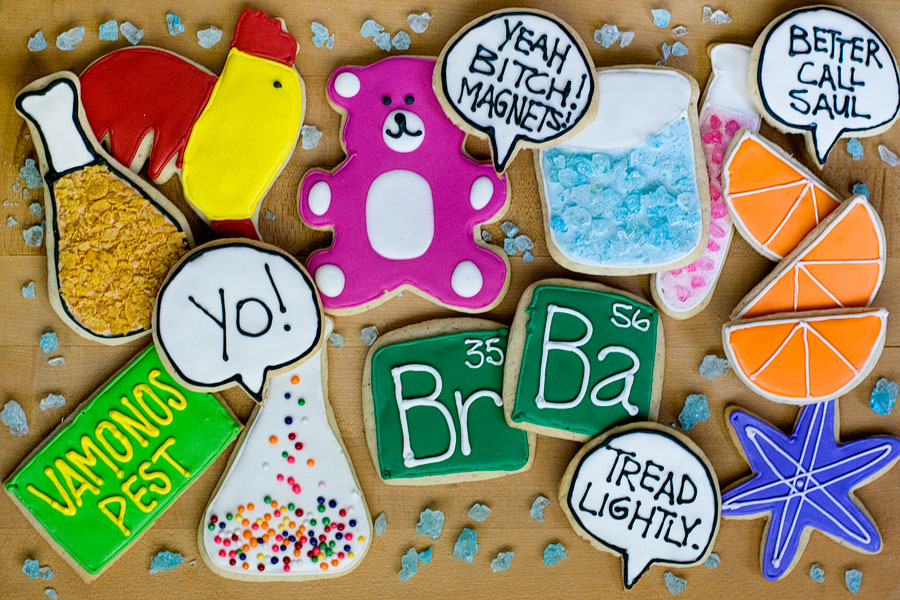
Breaking Bad Cookies

OK, who else is obsessed with Breaking Bad? I think it’s one of the best shows of all time. That may sound overly dramatic, but if you’ve seen the show, you know I’m right. Oddly, I hated the show during the first season. I found it dark, depressing, uncomfortable, and the thought of watching Walt go through chemo just wasn’t my idea of great TV. I’m glad I stuck with it though. . . even though it’s still dark, depressing, and uncomfortable!
The series finale is in a few weeks and I am dying to see how it all ends. I made these cookies back in August when I had more school-free time. The cookies are just a basic sugar cookie – use any recipe you’d like that is meant for cut-out cookies. Bridget’s recipe is great, as is Annie’s. I used my grandmother’s recipe for these. I’m sure she’d be so proud knowing that her beloved cookie recipe was used to make cookies representing a violent television show. ;)

As I have mentioned many times before, please visit Annie’s perfect post about decorating with royal icing. She’ll give you the entire rundown on how to outline, flood, etc.

And where do I come in? Let me give you a rundown on each of these cookies!

  • The rooster. Represents Los Pollos Hermanos! I found the rooster cookie cutter on Amazon. I kept it simple and just used yellow and red icing.
  • The chicken leg. Well… Los Pollos Hermanos is a fried chicken restaurant, so I had to include a fried chicken leg! I was inspired by Bridget’s post at Bake at 350. I didn’t have to buy a chicken leg cookie cutter. I used the same cookie cutter as I did for the Erlenmeyer flask – and rounded the edges more to make it look like a chicken leg.
  • The Vamonos Pest sign is self explanatory. I cut the rectangle out by hand, as I didn’t have a rectangle cookie cutter. I used neon green and bright yellow icing.
  • The pink teddy bear. If you watch the show, you remember the pink teddy bear falling from the sky. If you’re looking for a teddy bear cookie cutter, do a search on Amazon. There are a ton to choose from. The teddy bear on the show is more magenta than true pink, so I added a little purple food coloring to the pink icing I made. Sidenote: the bear also looks like evil Lotso from Toy Story III
  • The beaker of blue meth. Well, duh. Blue Sky is the name of Walt and Jesse’s meth. The beaker cookie cutter was included in this kit. I bought blue rock candy at a local candy store.
  • The test tube of pink manganese. OK, so they don’t make anything having to do with manganese. But remember Hank’s obsession with minerals? I liked the quote from Walt: “Manganese can have an oxidation between minus three and plus seven which takes it through a range of colors–purple, green, blue–but it’s most stable state is plus two… which is usually pale pink.” Given how much Vince Gilligan loves color, anyone else take that quote to mean that Walter WHITE and Jesse PINKman are at their best when they are working together? The test tube cookie cutter was part of this kit and the pink rock candy was from a local candy store.
  • The oranges. Surely we all remember when Carol dropped the grocery bag of oranges in the season premiere. “Hello, Carol.” Oranges are also thought to be a symbol of death on this show (and the Godfather, for anyone keeping track). I used a round cookie cutter to make the orange slices – just cut the circle in half.
  • The purple atom. The atom cookie cutter came from this kit. I made it purple as a tribute to Marie, who loves the color purple more than life itself.
  • The “Br” and “Ba” squares. The opening credits of the show use the periodic table in the text – ex: Breaking Bad. The opening credits use dark green. I cut the square myself, as I didn’t have a square cookie cutter.
  • The Erlenmeyer flask. Just a fun cookie that goes along with the chemistry theme of Walt and Jesse’s empire.
  • The quote bubbles. You’ll recognize all the quotes if you watch the show. Instead of buying a quote bubble cookie cutter (which I’m sure is out there somewhere), I used my circle cookie cutter — and made a few modifications to make it look like a quote bubble.
  • These cookies were a labor of love — but I love the show and I’m so sad that it’s ending!

Funfetti Sugar Cookies

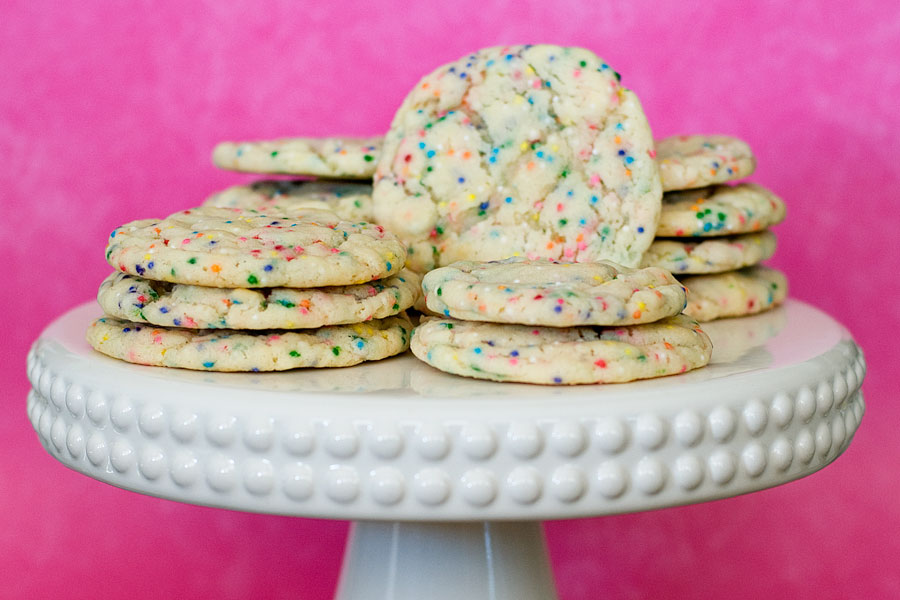
I am obsessed with sprinkles. This should be obvious, as I named this blog With Sprinkles on Top. Sprinkles are nothing more than little colored pellets of sugar — but they make everyone happy. Every kid wants sprinkles on their donut or ice cream cone, and for most of us, this lingers into adulthood. I found this great recipe for a simple sugar cookie on Sally’s Baking Addition. Sidenote: she has some GREAT cookie recipes. It’s one of my go-to blogs if I’m looking to try a new cookie. Check it out!
Funfetti Sugar Cookies
Recipe source: Sally’s Baking Addition
Print Recipe

1/2 cup (1 stick) unsalted butter, at room temperature
3/4 cup sugar
1 large egg, at room temperature
1 teaspoon vanilla extract
1-1/2 cups all-purpose flour
1/4 teaspoon salt
1 teaspoon baking powder
1/2 teaspoon baking soda
1 teaspoon cream of tartar (can not be omitted)
1/2 cup sprinkles, plus more for sprinkle on top before baking

1. In a large bowl using a hand-held mixer or stand mixer with paddle attachment, cream the softened butter for about 1 minute on medium speed. Then add the sugar on medium speed until fluffy and light in color. Mix in egg and vanilla. Scrape down the sides as needed. Set aside.
2. In a medium size bowl, whisk together the flour, salt, baking powder, baking soda, and cream of tartar. With the mixer running on low speed, slowly add the dry ingredients to the wet ingredients in 3 different parts. The dough will be very thick. Once combined, fold in 1/2 cup sprinkles.
3. Scoop a large sections of dough (about 2 Tablespoons of dough each) and roll into balls. Make sure the balls are taller, rather than wide. Add a few more sprinkles on top of each ball dough.
4. Chill the balls of dough on the cookie sheet for at least 2 hours and up to 48 hours in the refrigerator. This step will prevent spreading in the oven.
5. Preheat oven to 350F. Line two large baking sheets with parchment paper. Bake chilled cookie dough for 8 minutes. The cookies will appear undone and very soft.
6. Allow the cookies to cool on the cookie sheets for 3 minutes and move to wire rack to cool completely.

Brown Butter, Oatmeal, Butterscotch, and Toffee Chip Cookies


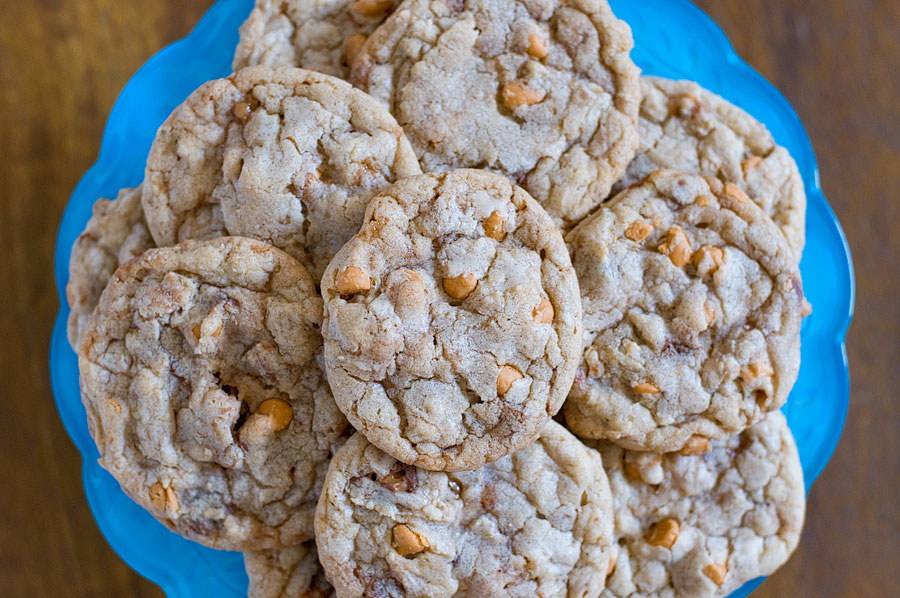
Long enough recipe title? Ha! There are just so many delicious things packed into this cookie. Have you ever tried a recipe involving browned butter? If not, please do. Seriously. If you cook butter long enough, it will turn brown and begin to smell nutty and even more delicious (and butter is pretty amazing in its regular form). I’m also a huge, huge fan of butterscotch and toffee, so these cookies were a must-try and they lived up to my expectations. Jen over at Picky Palate always creates such delicious cookie recipes – check her blog out if you haven’t already.

Brown Butter, Oatmeal, Butterscotch, and Toffee Chip Cookies
Recipe source: Picky Palate
Print Recipe

2 sticks unsalted butter
3/4 cup granulated sugar
3/4 cup packed light brown sugar
2 large eggs
1 teaspoon pure vanilla extract
2 1/4 cups all-purpose flour
3 tablespoons vanilla instant pudding mix (optional)
3/4 cup quick oats (I used regular oats and it worked fine)
1 teaspoon baking soda
3/4 teaspoon kosher salt
1 1/4 cup butterscotch chips
1/2 cup Heath Bar Toffee Chips/pieces

1. Preheat oven to 350 degrees F. and line a large baking sheet with parchment paper.
2. Place butter into a small saucepan over medium heat. Swirl and heat until deep golden brown. Remove heat and let cool for 5 minutes.
3. Place browned butter and little bits from the pan into a stand mixer along with the brown and granulated sugar. Beat to combine then add eggs and vanilla beating to combine. Add flour, pudding mix, quick oats, baking soda, salt and chips. Mix on low until just combined.
4. With a medium cookie scoop, place dough onto prepared baking sheet about 1 inch apart. Bake for 10 minutes, until baked through. Remove and let cool on baking sheet for 10 minutes before transferring to cooling rack.

Makes 2 to 3 dozen cookies.

Polka Dotted Cake

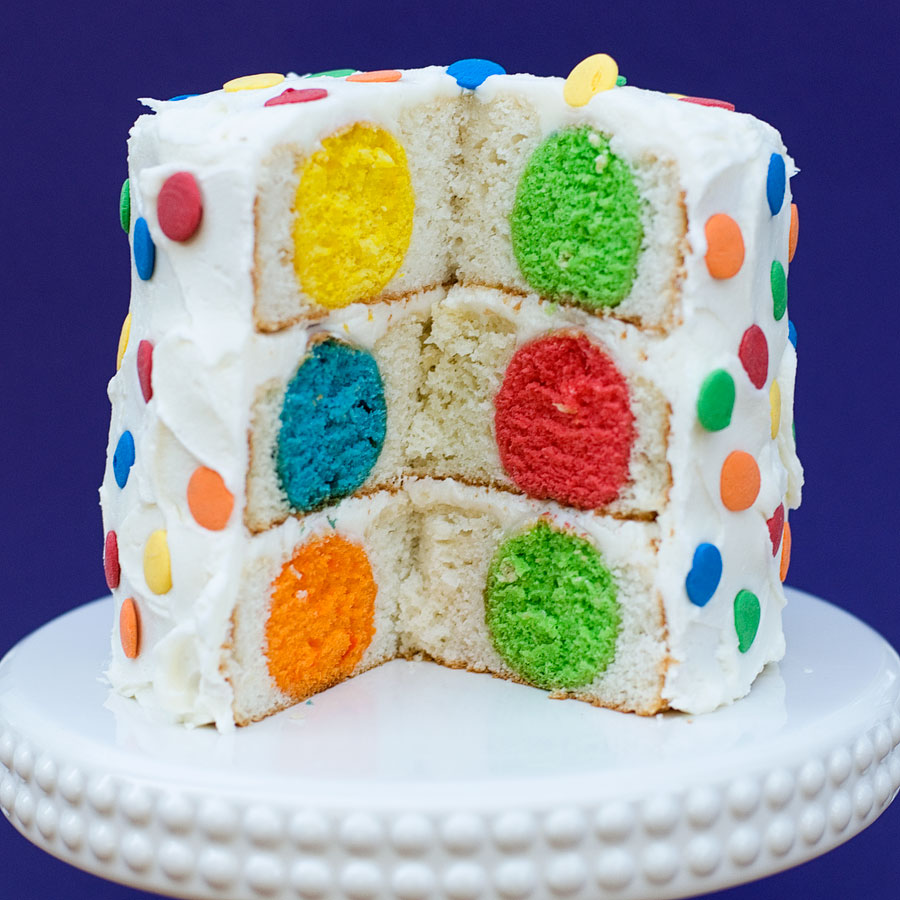
Happy 5 Year Anniversary to With Sprinkles on Top! I can’t believe I’ve been doing this for 5 years. I started my blog in 2008 while living in Chicago. Five years later, I’m living in Milwaukee, going through law school, and continuing to bake every chance I get. I wanted to make something a little ridiculous for this post — and I decided a polka dotted cake would fit the bill. This cake is not as difficult as it looks. Trust me! You just need a lot of things in order to pull it off — and a lot of time. I think this would be a PERFECT cake for a kid’s birthday party or a baby shower – as you could make the dots any colors you’d like.
Thank you all for a fun five years of blogging!

Polka Dotted Cake
Inspired by: Once Upon a Pedestal
Print Recipe

For the cake balls, you will need:
1 box white cake mix
3 whole eggs
Vegetable oil (go with the amount required on the box recipe)
Milk (substitute milk for the amount of water required on the box recipe)
1 box vanilla instant pudding
A cake pop maker – I highly recommend this one – it is amazing and makes perfect cake pops/balls; and it’s easy!
Various food colorings

For the cake, you will need:
2 boxes white cake mix (plus required eggs + oil)
[no need for substitutions on this one — just make a regular cake mix according to the box directions]
6″ cake pan(s)
Buttercream icing
Decorative sprinkles (optional)

1. Preheat oven to 350F.
2. Mix all of the cake ball ingredients listed above together. The substitutions work really well — it will produce a denser cake.
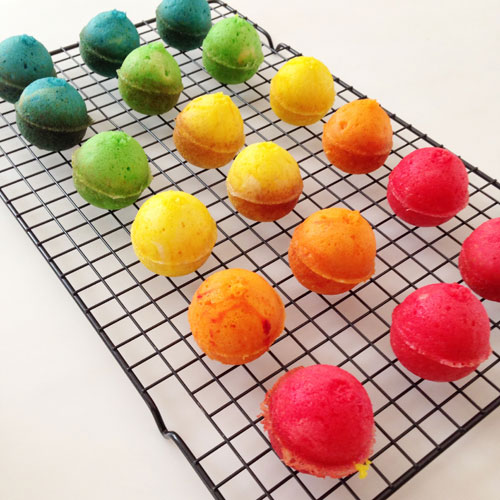
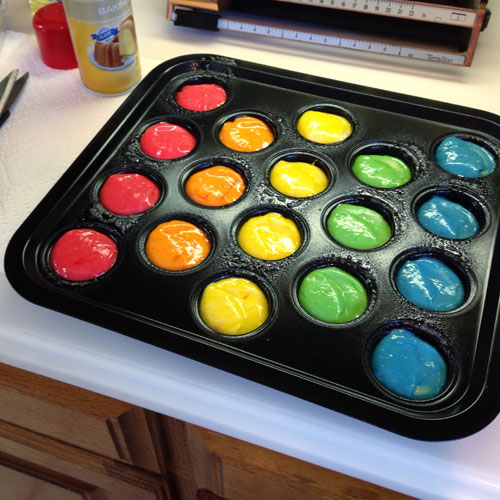
3. Divide the batter into small bowls and dye with food coloring. I used red, orange, yellow, green, and blue. You can use any colors you’d like.
4. I used the cake pop maker linked above. If you use that one, spray both the bottom and top pan with nonstick spray (use one that contains flour – I used Pam baking spray).
5. Pour the batter into the bottom pan (the pan without the holes).

6. Place the top pan onto the bottom pan and secure with the clips provided. Bake at 350F for about 15 minutes. The instructions that come with the cake pop pan will tell you to bake for almost 30 minutes. Not necessary! Mine were done in 15.
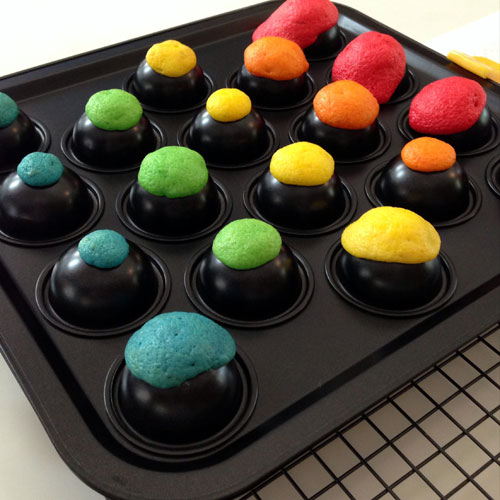
7. When the pan comes out of the oven, it will look like this:

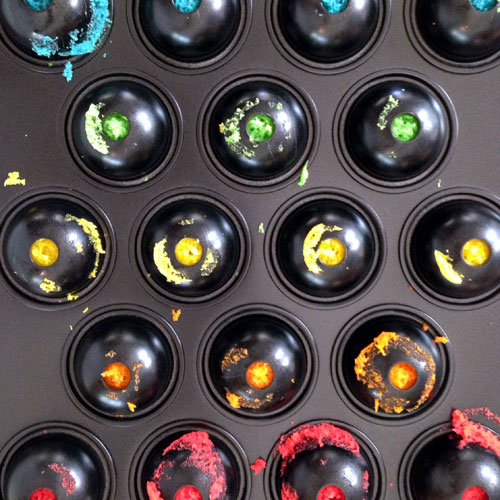
8. Don’t worry! Just cut off the overflowing blobs of cake. Once you do that, it’ll look like this:

9. Separate the pans and remove the cake balls to a wire rack for complete cooling.

10. Aren’t they pretty? While the cake balls are cooling, make the white batter for the rest of the cake. I made a white box mix and did not make any substitutions, unlike the cake balls. I had 2 white cake mixes on hand for this – just to be sure that I’d have enough batter to make a three-layer cake.
11. Once the cake balls have cooled, it’s time to make the cakes! Spray a 6″ cake pan with non-stick spray. Place a generous spoonful of white cake batter into the pan and spread the batter to cover the bottom of the pan.
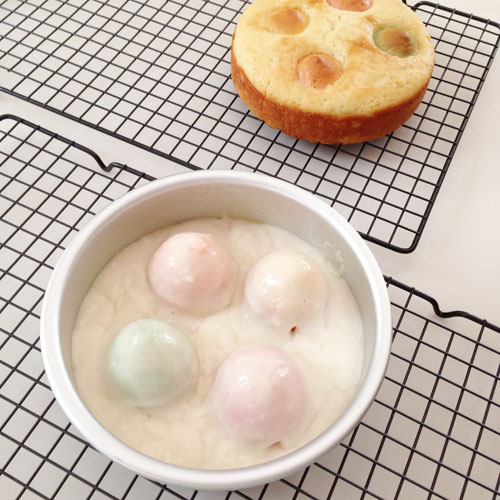
12. Place 4 cake balls into the pan. Cover the cake balls with more white batter. It’ll look like this:

13. Bake for about 30 minutes at 350F. It may take you more or less time — so watch the ovenStick a tester into the middle of the cake, if it comes out clean, you’re good to go.
14. Allow the cake to cool thoroughly on a wire rack.
15. Repeat this process to make two more cake layers. While the cakes are cooling, make a batch of buttercream icing. I used the white buttercream icing here.
16. Once the layers are cooled, assemble and frost the cake as you would any other. Tip: be sure to keep track of where the cake balls are so when you cut through the cake, you’ll hit them. I stuck toothpicks into the side of the cake where I knew the cake balls were sitting. Do whatever works for you.
17. Decorate with sprinkles if you’d like. That’s it! See, it wasn’t so difficult… just time consuming!