Recent Posts

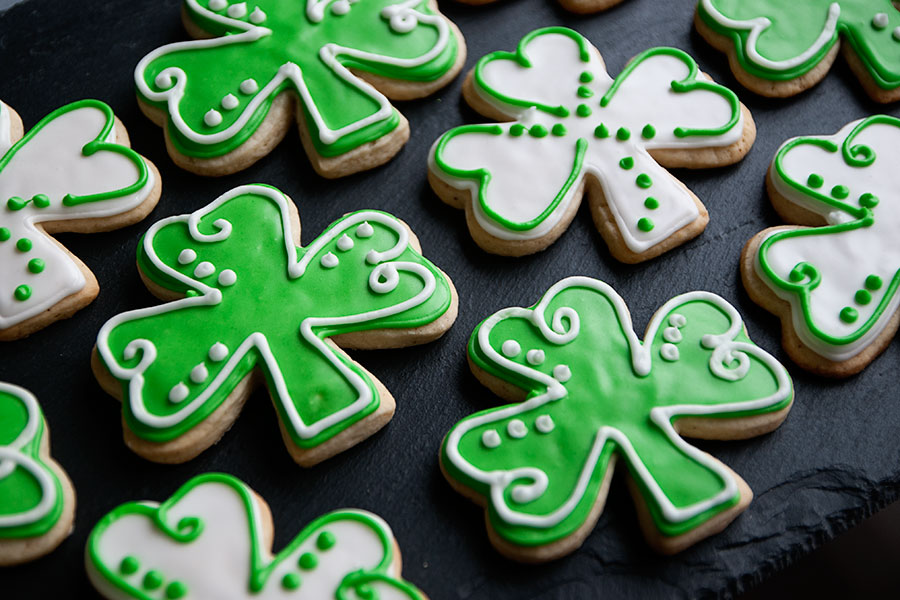
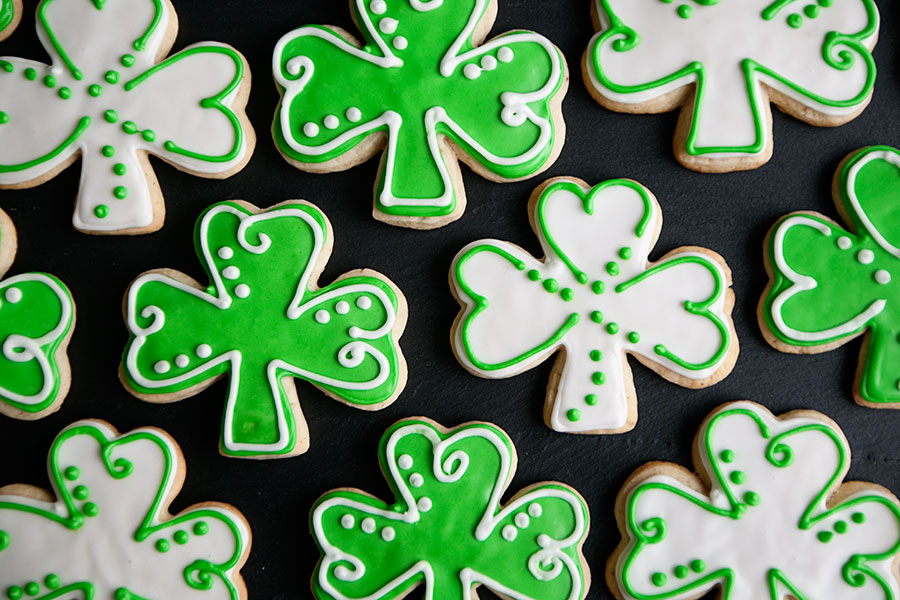
Shamrock Cookies

DSC_7974x900
I don’t think I have a drop of Irish blood in me, but I’ve always like St. Patrick’s Day. Probably because it marks the halfway point of March and is a sign that spring has arrived (or will be arriving soon). And if you are from the Midwest, you know that we’ve had an awful, awful winter. SPRING, WHERE ARE YOU?! I CAN’T DEAL.

So if you need a little cheer, make these cookies… and know that green grass, warmer temperatures, and flowers will be here soon.

Shamrock Cookies
Print Recipe

If you are a new to decorating with royal icing, here are some helpful tips and links:

  • I used my grandma’s sugar cookie recipe, which is listed below.  Another good cut-out cookie recipe can be found at Bridget’s wonderful Bake at 350.
  • I used a royal icing recipe from Annie’s Eats, which is listed below.
  • If you are new to decorating with royal icing, please visit this post by Annie’s Eats, which will teach you about outlining and flooding.  Bake at 350 is also a great resource for cookie decorating and ideas (I love Bridget’s book, too!).

Here are the specifics on how I made these cookies:

  • I used a Wilton comfort grip shamrock cookie cutter – I bought mine off of Amazon.com, but I’m guessing your local craft store would carry it.
  • I used Leaf Green Wilton gel coloring for the green icing.
  • I baked a batch of shamrock cookies, then outlined half of them with green icing and half with white.  After a few hours, I flooded the cookies with green or white icing.  After another 2 or 3 hours, piped the designs onto each cookie.

Omi’s Sugar Cookies
Print Recipe
1 cup butter
1 cup sugar
1 large egg
1/2 teaspoon salt
3 cups flour
1 teaspoon baking soda
1/2 cup sour cream
1 teaspoon nutmeg

Beat butter and sugar. Add eggs, sour cream, and nutmeg. Add dry ingredients gradually. Chill the batter overnight or for at least 4 hours. Roll out dough and cut with cookie cutters. Bake at 350F until golden. (in true fashion, my grandma didn’t give a specific baking time. I baked the cookies for about 8 minutes).

White Royal Icing
4 cups powdered sugar, sifted
2 Tablespoons meringue powder
5 Tablespoons water

Directions:
Combine all ingredients in the bowl of a stand mixer fitted with the paddle attachment. Mix on low speed until the sheen has disappeared and the icing has a matte appearance (about 7-10 minutes).  Transfer the contents of the mixing bowl to an air-tight container. This will be the stiffest consistency of the icing, and at this point it is still too stiff to use for decorating. Add water a very small amount at a time and stir by hand until fully incorporated. Continue until the icing has reached a consistency appropriate for piping.
DSC_7990x900

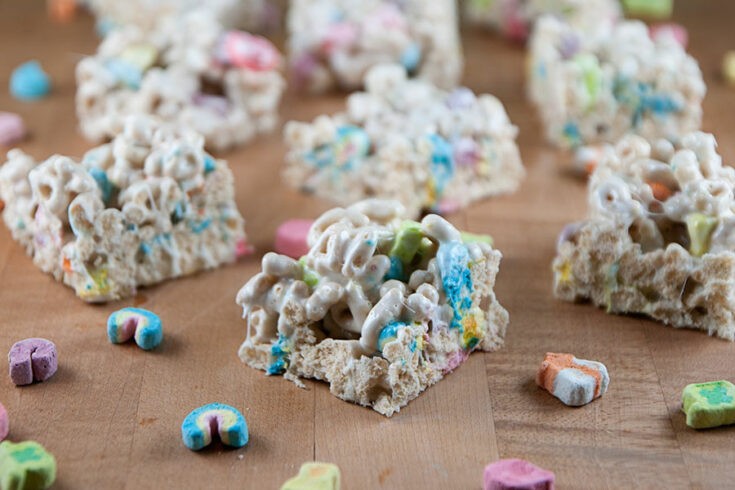
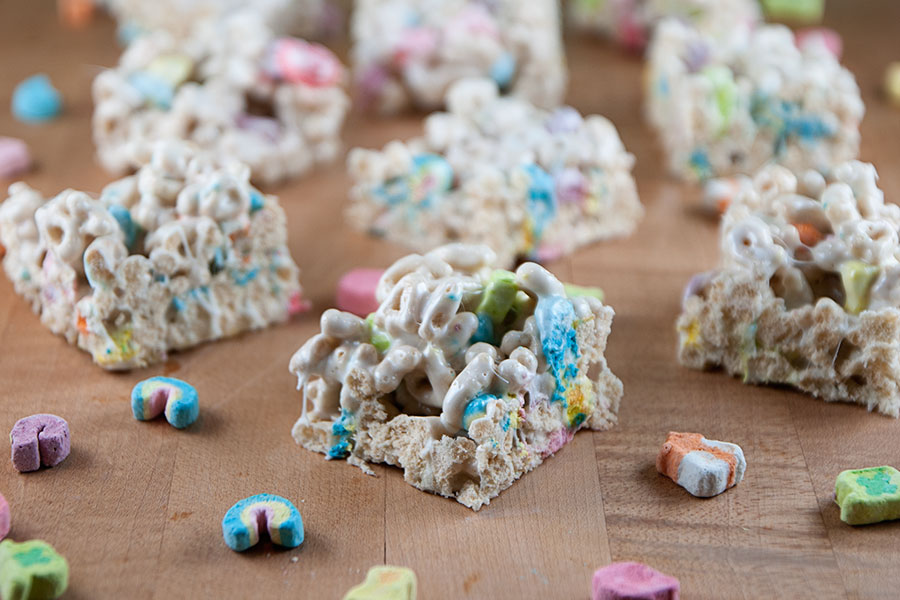
Lucky Charms Bars

DSC_7562x900
St. Patrick’s Day is a week from today!

If you want an EASY treat to make for school or the office, give these a try. They’re just a different version of the classic Rice Krispie treat – but made with Lucky Charms instead of Rice Krispies.

And I feel like I have to say this because I’ve gotten comments in the past: yes, these will be SWEET. Anything made with sugary cereal plus marshmallows will be SWEET. So I don’t wanna hear commentary about how SWEET these are. :)

Check back in a few days because I have some St. Patrick’s Day cookies to share!

Yield: About 9 bars

Lucky Charms Bars

Lucky Charms Bars

Marshmallow lovers unite! These bars are magically delicious!

Prep Time 10 minutes
Cook Time 15 minutes
Total Time 25 minutes

Ingredients

  • 4 cups Lucky Charms cereal
  • 7 oz. marshmallows
  • 2 Tablespoons butter

Instructions

    1. Spray a 9×9 pan with nonstick spray.

    2. Melt the butter in a large pan over medium heat.

    3. Add the marshmallows and stir until melted and smooth.

    4. Add the 4 cups of cereal and stir until completely coated in marshmallow.

    5. Pour into the 9×9" pan and flatten with the back of a spoon.

Notes

Your yield will depend on how big or small you cut your bars.

If you'd like to use a bigger baking pan -- like a 9x13" -- I would suggest doubling the ingredients.

How to Make a Million Cupcakes

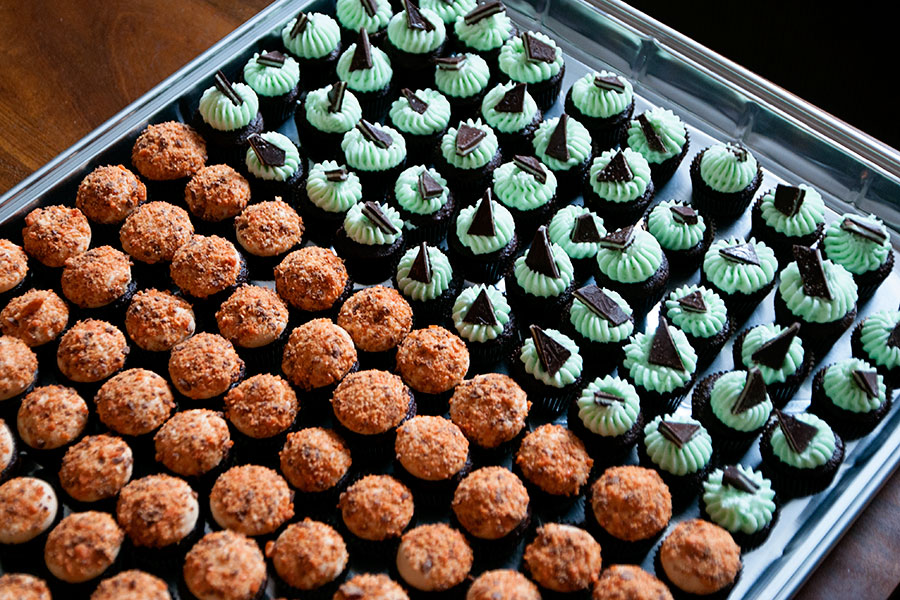
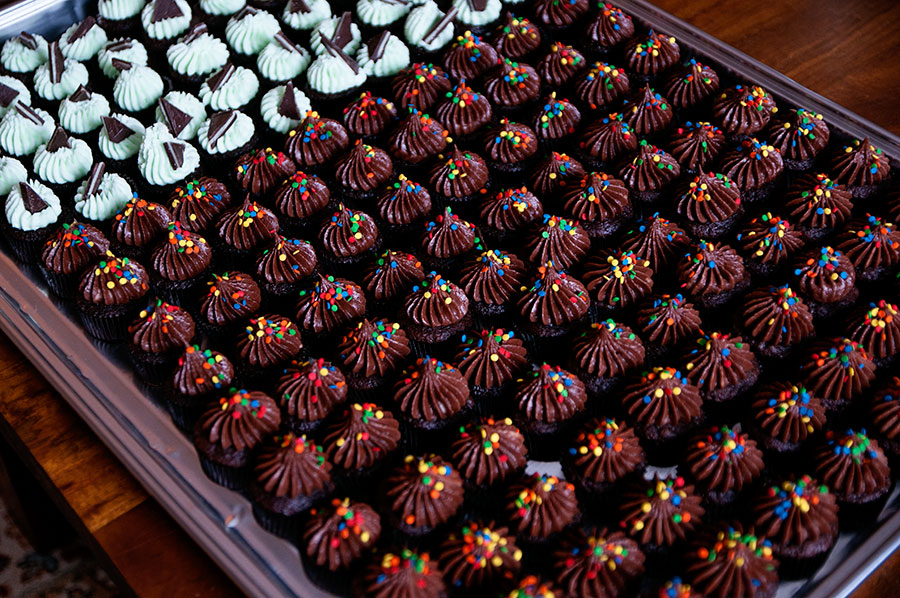
DSC_7743x900Okay, so I didn’t make a million cupcakes. Just 500 mini cupcakes. I was asked to donate all these cupcakes to my law school’s public interest auction. One of my law school BFFs asked, so how could I say no?! But let me tell you: this was an overwhelming task. I couldn’t just take a day off from school to bake, so here are my tips for making A LOT of cupcakes in not much time!
  • When feeding the masses, stick with well-loved flavors.  I made chocolate, funfetti, red velvet, mint, and peanut butter. This is not the time to experiment with banana creme or raspberry white chocolate.
  • For the love of christ, use box mixes! I know, I know, I know, some of you think that nothing in the world could be more offensive than a box cake mix. But here’s the deal: you don’t have much time, box mixes are cheap, and most importantly, box mixes are really reliable.
  • …but make your own icing! The icing can be made a few days in advance and stored in air-tight containers. I made a batch or two of icing each day leading up to the day I baked the cupcakes.
  • Do not make the cupcakes too far in advance. I made all of the cupcakes the night before our auction. You want them to be as fresh as possible and the only way to do that is to stay up late the night before the event.
  • Enlist help if possible. Thank youuuu x1,000, Andrea!
  • With food (and many other things in life), appearance is really important. Try your best to make your cupcakes look good. Cause that’s what is going to make people want to eat them.
  • Garnish! I used sprinkles to decorate the chocolate and funfetti cupcakes. I cut up a bunch of Andes mints to use for the mint cupcakes. I dipped the peanut butter cupcakes into Butterfinger crumbles. And I placed a red Wilton heart on each red velvet cupcakes. All of these options were cheap and easy to do.
  • Transporting these babies was a challenge. I bought three really big trays at a local baking shop — and had friends help me take the cupcakes to school (cause someone had to hold them steady while I drove!).
  • That’s it!

DSC_7755x900DSC_7777x900

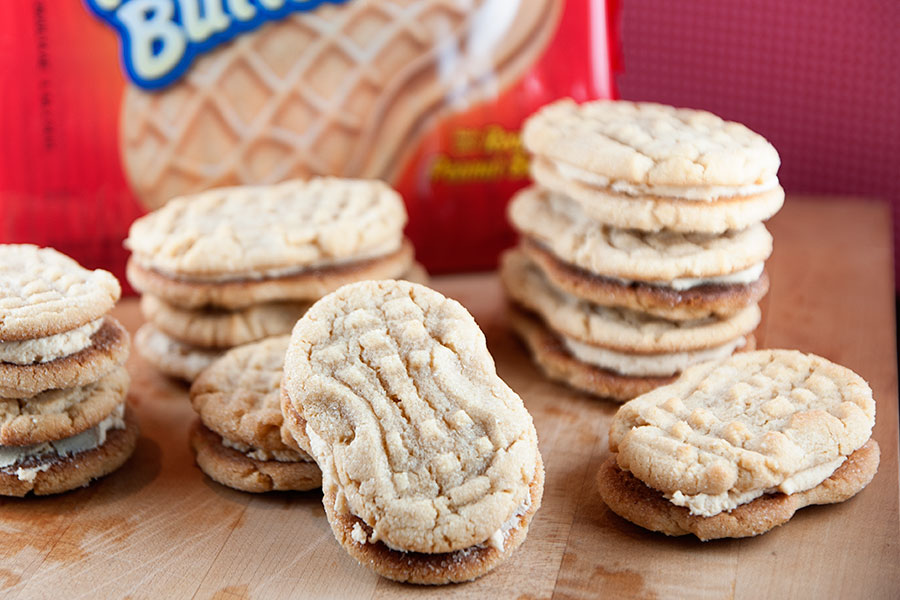
Homemade Nutter Butters

DSC_7658x900
Nutter Butters are cookies that I often forget exist. Cause let’s be real, if I’m in the cookie aisle I’m heading directly to the Oreos or Keebler Elves. But oh, delicious Nutter Butters, you are lovely and I’m sorry for always forgetting about you.

My law school BFF, Andrea, made these homemade Nutter Butters last fall and I ate an embarrassing amount of them while at her house (and guys, these are BIG cookies). I knew at that moment that I had to make & share them on my blog! Hope you enjoy!

Homemade Nutter Butters
Recipe source: Cookies & Cups
Print Recipe

1 cup butter, room temperature
1 cup creamy peanut butter
1 cup granulated sugar
1 cup light brown sugar, packed
2 eggs
2 tsp vanilla
2 1/2 cups flour
1 tsp baking soda
1 tsp baking powder
About 1/3 cup extra sugar for rolling

Filling:
1 cup butter, room temperature
1 cup creamy peanut butter, room temperature
4 cups powdered sugar
2-3 tablespoons milk

1. In a large bowl with mixer beat butter, peanut butter, and sugars until light and fluffy, about 30 seconds on medium-high speed. Lower mixer to medium and add eggs and vanilla continuing to mix until combined.
2. Turn mixer to low and add in flour, baking soda and baking powder. Mix until combined. 3. Refrigerate dough for 1 hour.
4. Preheat oven to 375°
5. Form chilled dough first into 1 inch balls and then form into a log shape. Roll the log-shaped dough in extra granulated sugar and place on baking sheet about 2 inches apart. Using a fork press down on cookie creating a criss-cross pattern. Pinch the center to create the peanut shape.
6. Bake for 6-8 minutes until edges are lightly golden. Cool on baking sheet 2-3 minutes and then transfer to wire rack to continue cooling.

Filling:
1. In a large bowl beat butter and peanut butter together until smooth. Slowly add in your powdered sugar and turn mixer speed up to medium and beat until filling is smooth.
2. Add your milk, one tablespoon at a time until desired consistency is reached.
3. Spread a heaping tablespoon of filling onto the bottom of one of the peanut butter cookies and then top with another cookie to create sandwich.

Makes a couple dozen cookies.

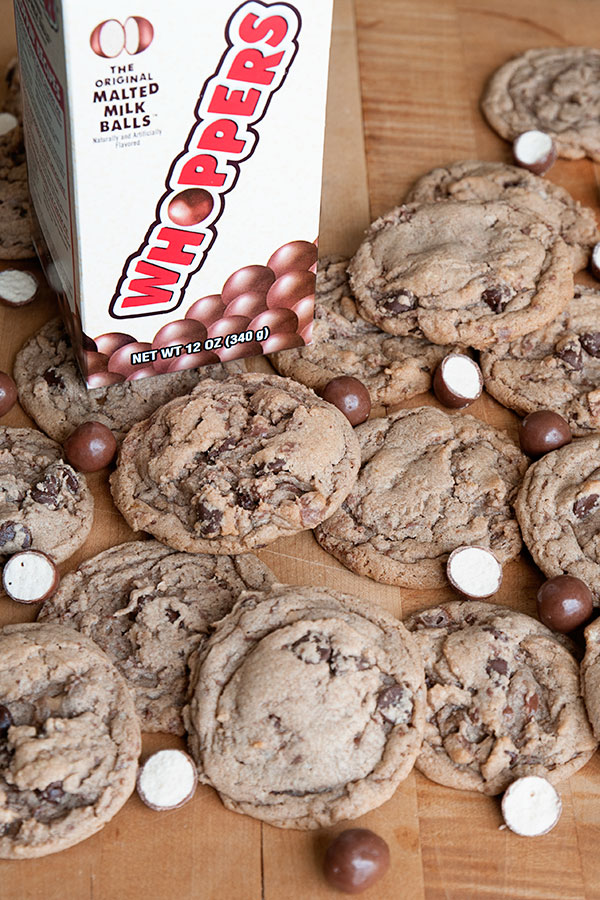
Whoppers Cookies

DSC_7465x900
Oh, Whoppers, you are delicious. I love all things malty – chocolate malts, Robbins Eggs candy at Easter, Whoppers, and those to-die-for giant malted milk balls that I buy at my local grocery store. These cookies were delicious – though I did make one ingredient change. I used chocolate malt powder instead of plain malt powder. Because duh. CHOCOLATE.

Whoppers Cookies
Recipe source: Two Peas & Their Pod
Print Recipe

2-1/4 cups all-purpose flour
1/2 cup malted milk powder [I used chocolate]
2 teaspoons cornstarch
1 teaspoon baking soda
1/2 teaspoon sea salt
3/4 cup unsalted butter, at room temperature
1 cup dark brown sugar
1/4 cup granulated sugar
1 large egg
2 teaspoons vanilla extract
1 cup semi-sweet chocolate chips
1 cup chopped Whoppers candies (or any malted milk balls)

1. Preheat oven to 350 F. Line a large baking sheet with parchment paper and set aside.
2. In a large bowl, whisk flour, malted milk powder, cornstarch, baking soda and sea salt together. Set aside.
3. In the bowl of a stand mixer, cream together butter and sugars until smooth and creamy, about 3 minutes. Add egg and vanilla extract and beat until combined. Slowly mix in the dry ingredients.
4. Stir in the chocolate chips and malted milk balls. Form cookie dough into tablespoon balls and place on prepared baking sheet, about 2 inches apart.
5. Bake cookies for 10 minutes, or until slightly golden brown around the edges. Let the cookies cool on the baking sheet for two minutes. Transfer to a wire cooling rack and cool completely.