Recent Posts

Fall Leaf Cookies

DSC_2248x900
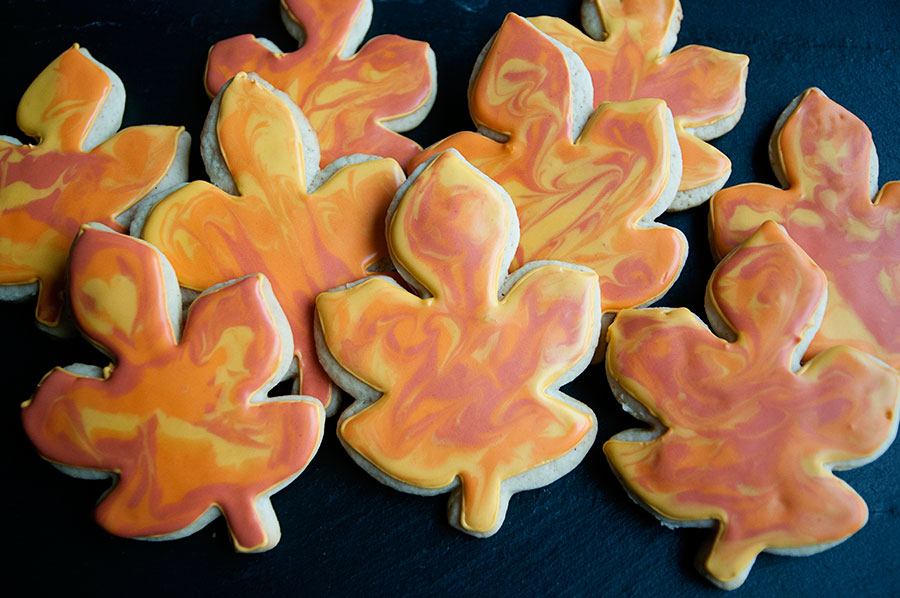
Sadly, the beautiful fall colors in Milwaukee have peaked. The leaves are starting to fall of the trees and the colors are starting to dull. I think October is the prettiest month of the year and I’m always sad when it comes to an end. In an effort to cling to fall a little bit longer, I made these cookies. My friend Andrea made similar cookies a few weeks ago and I fell in love — who knew that swirling different colors together would be so easy and produce such a pretty result? You can use any colors you’d like!

If you are a new to decorating with royal icing, here are some helpful tips and links:

  • I used my grandma’s sugar cookie recipe, which is listed below.  Another good cut-out cookie recipe can be found at Bridget’s wonderful Bake at 350.
  • I used a royal icing recipe from Annie’s Eats, which is listed below.
  • If you are new to decorating with royal icing, please visit this post by Annie’s Eats, which will teach you about outlining and flooding.  Bake at 350 is also a great resource for cookie decorating and ideas (I love Bridget’s book, too!).

Here are the specifics on how I made these cookies:

  • I used a leaf cookie cutter from Wilton. The one I used is from their comfort grip line
  • I used three colors for the icing — all Wilton gel dyes: buttercup yellow, orange, and copper. You can use any fall colors you’d like — reds, oranges, yellows, browns, and greens!
  • I would recommend making two batches of royal icing — you won’t be able to cover all the cookies with just one.
  • Once you have all of your icing made, divide it into three bowls — use your gel dyes to color the icing.
  • I outlined my cookies with yellow icing, but you can use any color you’d like.
  • Once the outlines have set and you’ve thinned your icing and filled the plastic squeeze bottles (if you are lost at this point, see the links above!), squeeze the different colors of icing onto your cookies. Use a toothpick to swirl the different colors together.
  • There is no perfect way to do this — experiment and see what technique you like best!

Omi’s Sugar Cookies
Print Recipe
1 cup butter
1 cup sugar
1 large egg
1/2 teaspoon salt
3 cups flour
1 teaspoon baking soda
1/2 cup sour cream
1 teaspoon nutmeg

Beat butter and sugar. Add eggs, sour cream, and nutmeg. Add dry ingredients gradually. Chill the batter overnight or for at least 4 hours. Roll out dough and cut with cookie cutters. Bake at 350F until golden (in true fashion, my grandma didn’t give a specific baking time. I baked the cookies for about 8 minutes).


White Royal Icing
4 cups powdered sugar, sifted
2 Tablespoons meringue powder
5 Tablespoons water

Directions:
Combine all ingredients in the bowl of a stand mixer fitted with the paddle attachment. Mix on low speed until the sheen has disappeared and the icing has a matte appearance (about 7-10 minutes).  Transfer the contents of the mixing bowl to an air-tight container. This will be the stiffest consistency of the icing, and at this point it is still too stiff to use for decorating. Add water a very small amount at a time and stir by hand until fully incorporated. Continue until the icing has reached a consistency appropriate for piping.

*I made two batches for this project.
OMG Peanut Butter Cookies

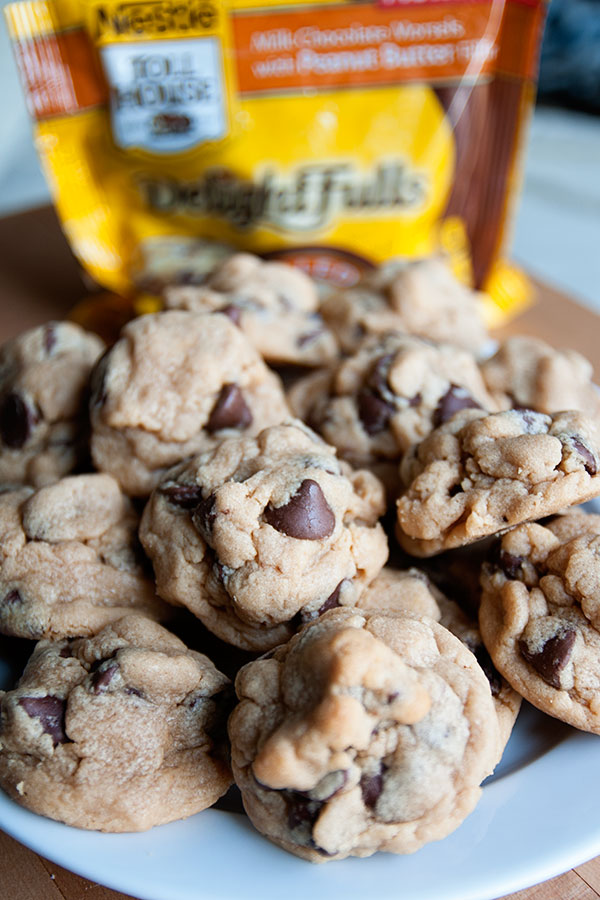
DSC_1487x900OMG. You guys. Have you tried Toll House’s DelightFulls? They are amazing. A chocolate chip with peanut butter inside the chocolate chip. I know, right? I saw them in the baking aisle at my grocery store and a few things ran through my mind: why were these not invented sooner? I hope they are as good as they sound! And honestly… America, effff yeah. Cause where else but the land of excessive and ridiculous foods would you find these?
Good news though — they are even better than you may have imagined. They make other flavors as well — mint, raspberry, and one more that I’m forgetting. I’m not being paid or compensated by Nestle to promote these. They’re just really, really good!

OMG Peanut Butter Cookies
Recipe adapted from: Sally’s Baking Addiction
Print Recipe

1/2 cup salted butter, softened to room temperature
1/2 cup light brown sugar
1/4 cup granulated sugar
1 large egg
3/4 cup creamy peanut butter
1 teaspoon vanilla extract
1/2 teaspoon baking soda
1-1/4 cups all-purpose flour
1/2 cup honey roasted peanuts [I left these out]
1 cup Nestle Toll House Peanut Butter DelightFulls

1. In a large bowl, using a hand-held mixer or stand mixer with paddle attachment, cream the butter and sugars together on medium speed. Mix in the peanut butter, egg, and vanilla.
2. Slowly mix in the baking soda and flour. Do not overmix.
3. Fold in the peanuts, peanut butter cups, and peanut butter chips. Chill the dough for at least 30 minutes.
4. Remove dough from the refrigerator. Allow the dough to sit at room temperature for 10 minutes so you can easily roll it. Preheat oven to 350 degrees.
5. Drop chilled dough by tablespoonfuls onto parchment-lined cookie sheets. Gently press down to slightly flatten. Bake for 8-9 minutes. Cookies will be soft and may appear undone. They will firm up as they cool. Allow to cool completely on a wire rack.

Makes 2-3 dozen cookies.

Halloween & Fall Ideas 2014

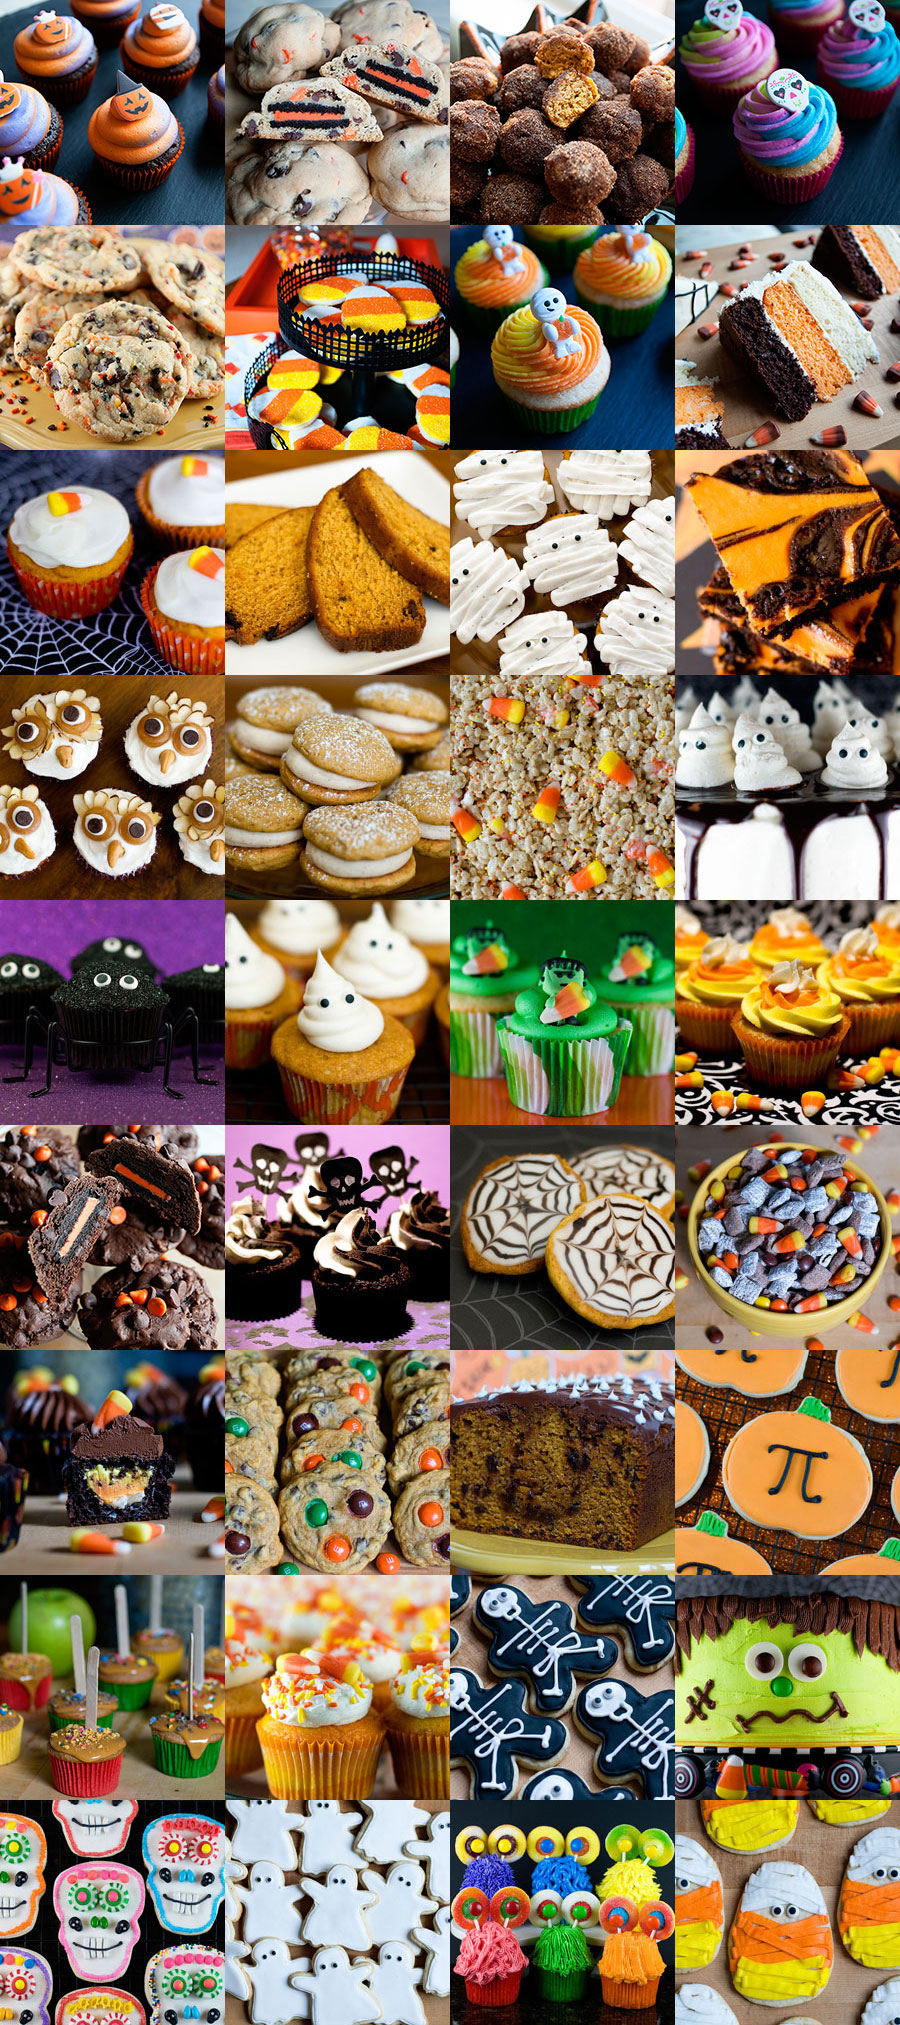
2014halloweenHalloween is coming up on Friday! Do you need to make a treat for work or for your kid’s school party? Here are almost all of the Halloween/fall treats that have been featured on my blog throughout the years. Enjoy & have a safe holiday!
1. Sugar Pumpkin Cupcakes
2. Halloween Oreo Stuffed Chocolate Chip Cookies
3. Pumpkin Mini Muffins
4. Sugar Skull Cupcakes
5. Cake Batter Halloween Cookies
6. Candy Corn Cookies
7. Sugar Mummy Cupcakes
8. Indian Corn Cake
9. Pumpkin Cupcakes
10. Pumpkin Raisin Bread
11. Mummy Cupcakes
12. Halloween Brownies
13. Hoot Owl Cupcakes
14. Pumpkin Sandwich Cookies
15. Trick-or-Treat Rice Krispie Treats
16. Ghost Cake
17. Spider Cupcakes
18. Pumpkin Cupcakes II
19. Frankenstein Cupcakes
20. Candy Corn Cupcakes
21. Halloween Oreo Stuffed Chocolate Cookies
22. Chocolate & Vanilla Halloween Cupcakes
23. Pumpkin Spiderweb Cookies
24. Halloween Puppy Chow
25. Candy Corn Surprise Cupcakes
26. Pumpkin M&M Cookies
27. Pumpkin Chocolate Chip Bread
28. Pumpkin Pi Cookies
29. Caramel Apple Cupcakes
30. Candy Corn Cupcakes
31. Skeleton Cookies
32. Frankencake
33. Day of the Dead Cookies
34. Ghost Cookies
35. Monster Cupcakes
36. Candy Corn Mummy Cookies

Candy Corn Cookies

DSC_1824x900
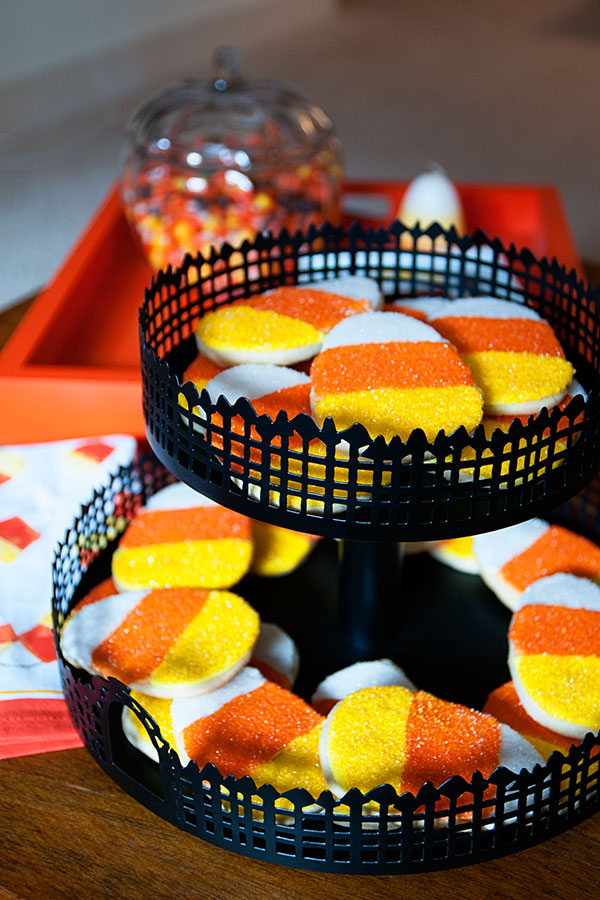
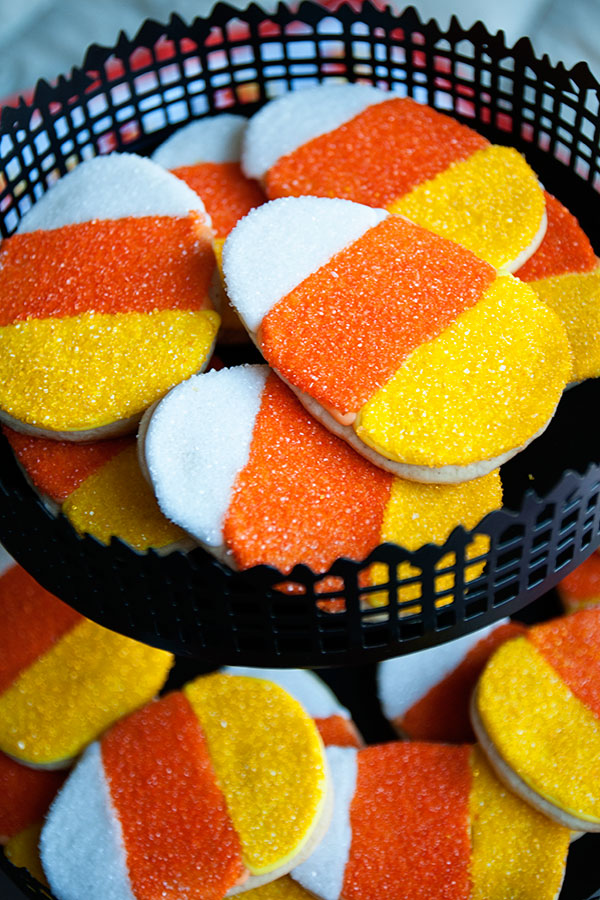
This is last of my Halloween posts! I think Halloween is one of the best baking seasons – you can do so many cute things with so many great flavors. Christmas and Halloween can’t be beat for yummies, right? Every year I try to come up with a new way to bake something resembling candy corn — and this year it’s a simple sugar cookie decorated with sanding sugar. If you want to seen what I’ve done in years past, check out my holiday treats archive! Below are the recipes I used and the details for how to make these. Enjoy!

If you are a new to decorating with royal icing, here are some helpful tips and links:

  • I used my grandma’s sugar cookie recipe, which is listed below.  Another good cut-out cookie recipe can be found at Bridget’s wonderful Bake at 350.
  • I used a royal icing recipe from Annie’s Eats, which is listed below.
  • If you are new to decorating with royal icing, please visit this post by Annie’s Eats, which will teach you about outlining and flooding.  Bake at 350 is also a great resource for cookie decorating and ideas (I love Bridget’s book, too!).

Here are the specifics on how I made these cookies:

  • I had a candy corn cookie cutter in my stash — but you know what would also work? An Easter egg cookie cutter. Improvise if that’s all you’ve got!
  • I made two batches of royal icing (recipe below). I dyed a portion of the icing orange, a portion yellow, and left the rest white. You don’t have to dye the icing (as you’ll be covering it up with sanding sugar), but I think the colors of the end product are richer if you do.
  • You will need orange, yellow, and white sanding sugar, plus the required outlining/flooding supplies as described in the links above.
  • I outlined the yellow portion of the cookies first, then the orange, then the white. Once all of the outlines were dry, I began the flooding process. Flood the yellow portions first — and dip into yellow sanding sugar. Allow the cookies to sit for about 30 minutes. Then repeat the process for the orange portion, then for the white portion.
  • As always, please let me know if you have questions :)
  • PS: the cookie/cupcake stand in the photo above is from Crate & Barrel (fall 2014).

Omi’s Sugar Cookies
Print Recipe
1 cup butter
1 cup sugar
1 large egg
1/2 teaspoon salt
3 cups flour
1 teaspoon baking soda
1/2 cup sour cream
1 teaspoon nutmeg

Beat butter and sugar. Add eggs, sour cream, and nutmeg. Add dry ingredients gradually. Chill the batter overnight or for at least 4 hours. Roll out dough and cut with cookie cutters. Bake at 350F until golden (in true fashion, my grandma didn’t give a specific baking time. I baked the cookies for about 8 minutes).


White Royal Icing
4 cups powdered sugar, sifted
2 Tablespoons meringue powder
5 Tablespoons water

Directions:
Combine all ingredients in the bowl of a stand mixer fitted with the paddle attachment. Mix on low speed until the sheen has disappeared and the icing has a matte appearance (about 7-10 minutes).  Transfer the contents of the mixing bowl to an air-tight container. This will be the stiffest consistency of the icing, and at this point it is still too stiff to use for decorating. Add water a very small amount at a time and stir by hand until fully incorporated. Continue until the icing has reached a consistency appropriate for piping.

** Note! I made two batches of this icing for this project.

DSC_1817x900

Cake Batter Halloween Cookies

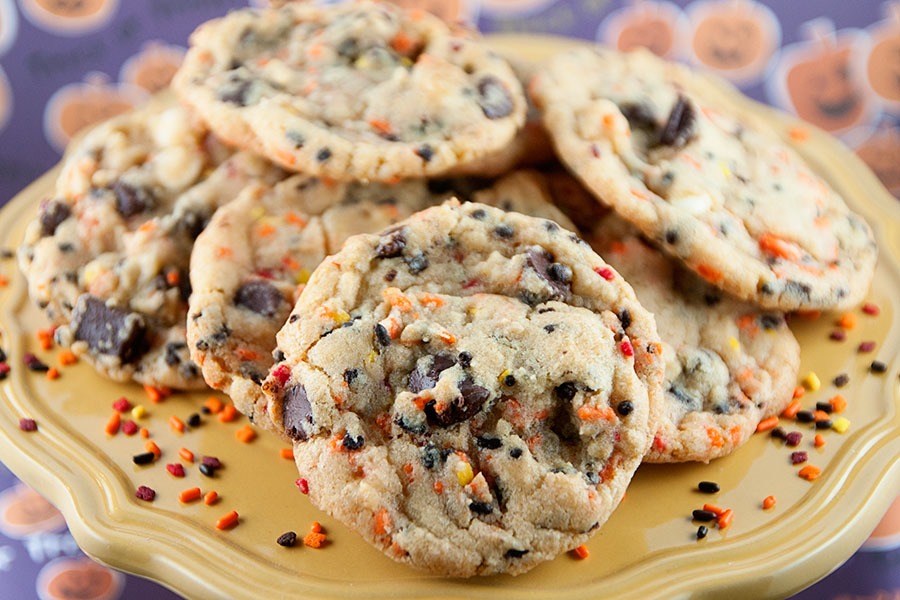
DSC_1876x900I’ve blogged this recipe before — but I’m back at it again because it’s always such a huge hit. It’s one of Sally’s Baking Addiction‘s wonderful recipes and all I did was a little Halloween to the mix. But really. Make these cookies. Really. SO GOOD!

Cake Batter Halloween Cookies
Recipe source: Sally’s Baking Addiction
Print Recipe

1-1/4 cups all-purpose flour
1-1/4 cups white or yellow boxed cake mix
1/2 teaspoon baking soda
3/4 cup unsalted butter, at room temperature
1/2 cup granulated sugar
1/2 cup light brown sugar
1 egg
1-1/2 teaspoons vanilla
1 cup chocolate chips (I used orange and black Halloween chips; plus a few chocolate chunks)
1/2 cup sprinkles (I found Halloween sprinkles at my local grocery store)

1. In a large bowl, sift together flour, cake mix, and baking soda. Set aside.
2. In a separate bowl, cream together the butter and sugars on medium speed. Mix in the egg and vanilla until creamy.
3. Add the flour mixture to the wet ingredients and mix until just combined. Do not overmix!
4. Fold in the chocolate chips and sprinkles.
5. Cover and refrigerate the dough for at least 1 hour. (I let sit overnight) You must do this refrigeration step otherwise the dough will be too sticky and the cookies will spread.
6. Preheat oven to 350F and line cookie sheets with parchment paper.
7. Scoop rounded tablespoons of the cold dough onto the cookie sheets. Make sure that the balls of dough are taller than they are wide (I’m not sure how this works, but it helps to make the cookies thicker and they will spread less).
8. Bake for about 10 minutes, or until the edges are golden brown. Allow the cookies to cool on the baking sheet for about 5 minutes, then transfer to wire racks for complete cooling.

Makes about 2 dozen cookies.