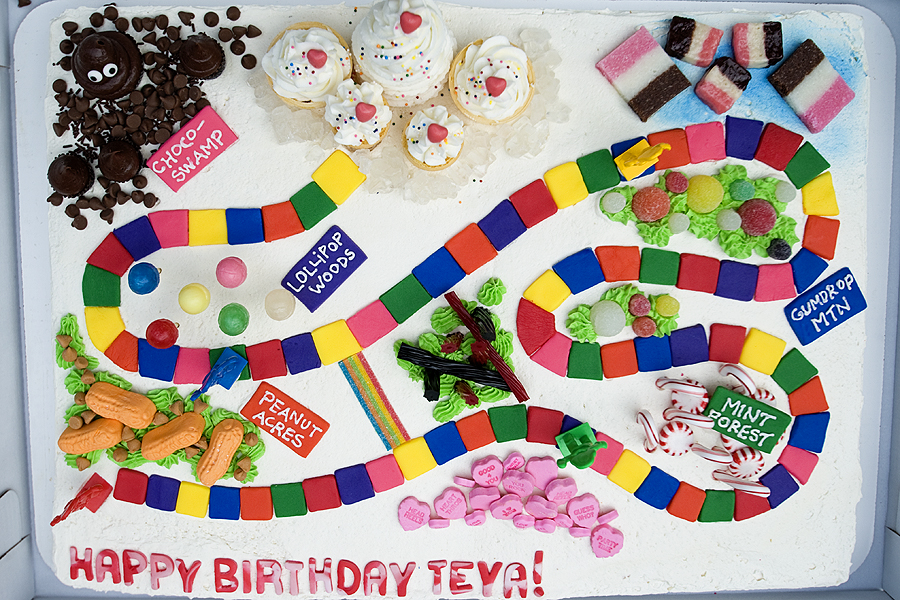
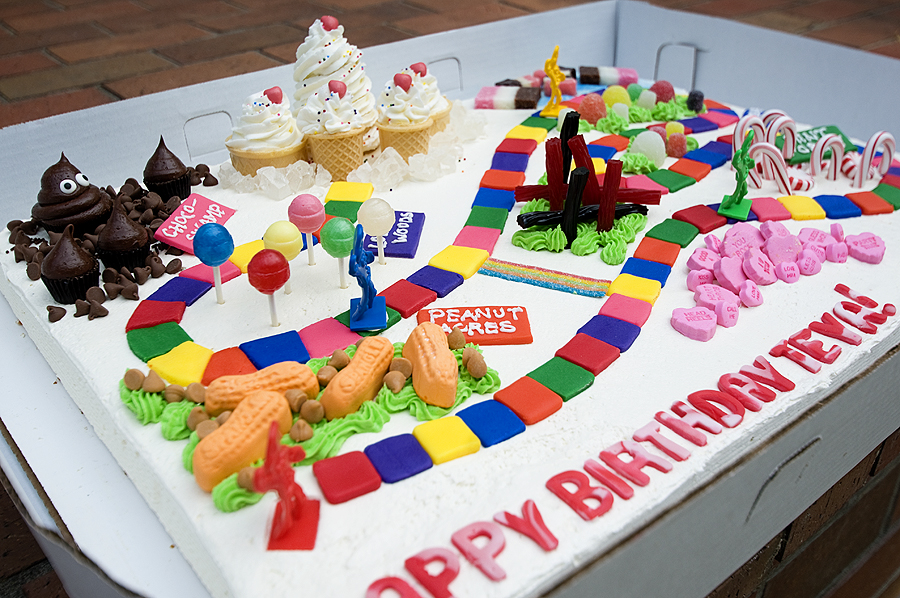
Candy Land has always been my favorite board game. Even as a twenty-something, I still ADORE it. It reminds me of being a kid and all of the memories of playing the game with my grandparents. It’s a classic game that I hope to someday play with my own kids. I made this cake for Teya, who turned 1 year old last week. Her mom let me pick the theme of her birthday cake — which was perfect, as I’ve been wanting to make a Candy Land cake for YEARS! Here’s how I did it…
- First and foremost, I cheated. I had to make this cake on a Friday afternoon/evening and only had about 8 hours to work — and I was leaving early the next morning for an out-of-town wedding. I didn’t have the flexibility that I normally have when making birthday cakes. So I made my life easier and bought a pre-made cake from a local bakery. The cake is HUGE. It was about 18″x24″ — and you will need all of that space to fit in all of the elements of the game. The bakery also frosted the cake for me, another huge time-saver!
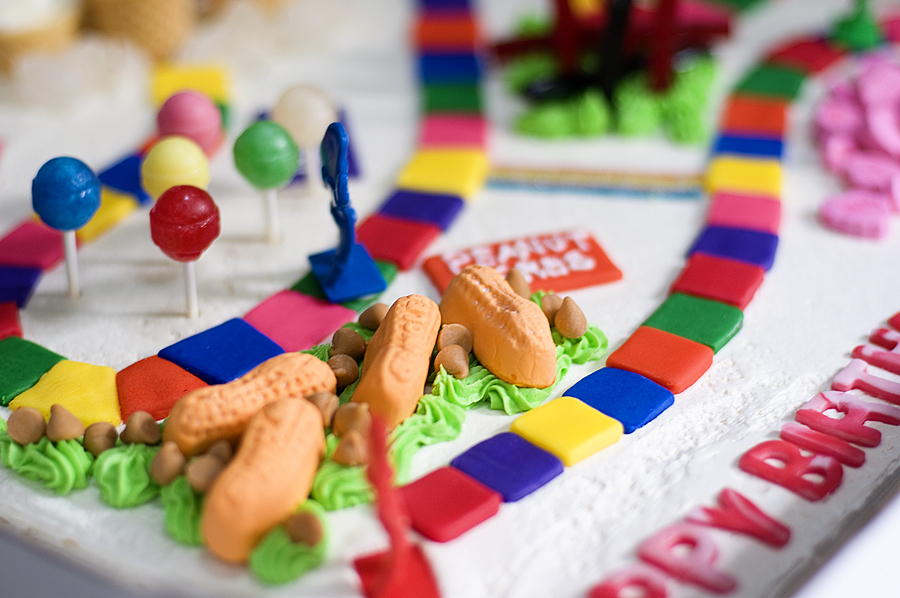
- I used a small (about 1″x1″) square fondant cutter to make the board game squares. I rounded the corners a bit to make it look softer. You’ll also need to shape the pieces according to the curves in the path. Before I placed any of the fondant squares on the cake, I used a knife to “draw” the path into the cake so I had a template to go from.
- You can use any Candy Land board you’d like for inspiration. I think the older boards are far more charming, so I drew more inspiration from the 1960s/1970s/1980s boards than I did from the current board. All you have to do is Google “Candy Land board” and you’ll be presented with a ton of images to get ideas from.
- I mixed white and red fondant together, rolled it out, and used alphabet fondant cutters to make the “Happy Birthday Teya!” text. I wanted a look that was similar to the candy cane style of the “Candy Land” lettering.
- Peanut Acres was made by piping green frosting onto the cake for “grass”, and then placing butterscotch chips and orange circus peanuts onto the cake.
- I had to special-order the candy hearts from an online candy store — as we are definitely out-of-season for Valentine candy!
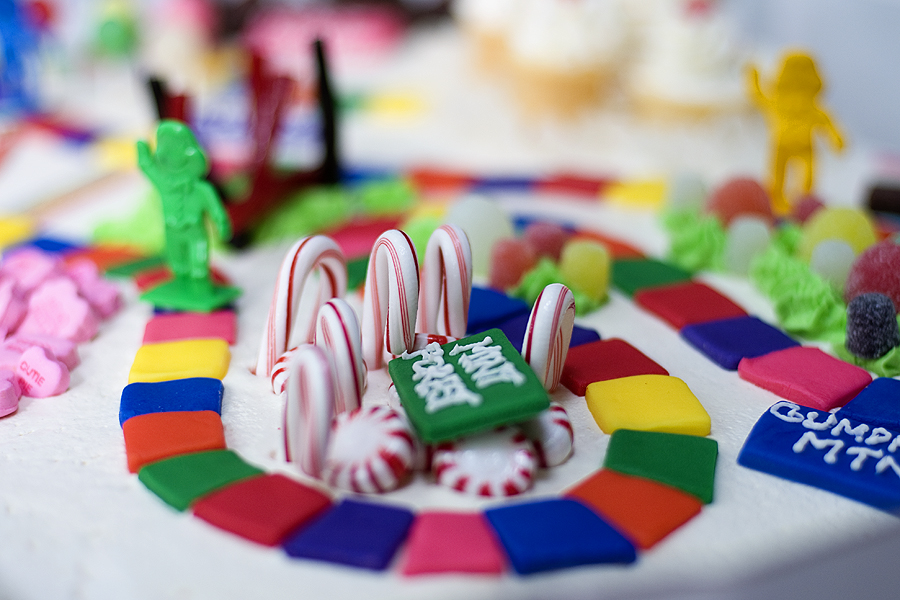
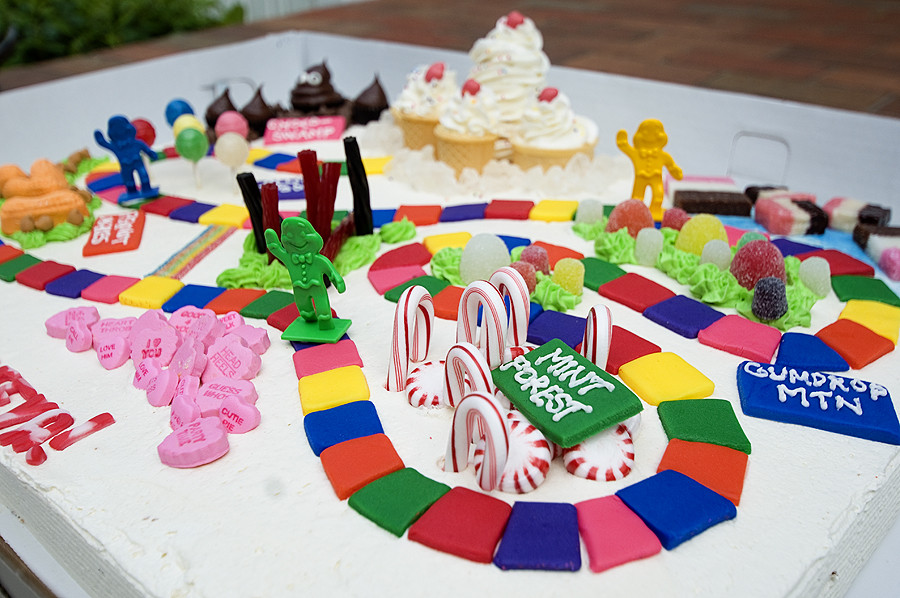
- I also had to special-order the small candy canes for the Mint Forest. I found the red & white starlite mints at Walgreens.
- Lord Licorice’s section of the board was made by cutting red and black licorice sticks in half and then pressing them into the cake.
- The rainbow path was made using a sweet-and-sour candy that I found at Walgreens. I forgot the name of the candy — but it comes in a bright green package!
- Lollipop Woods was made using Dum Dums.
- Gumdrop Mountain was make using both large and small gumdrops, placed onto a bed of green frosting.
- The ice cream floats are Neapolitan coconut candies — the smaller candies are made by Brach’s. I found them at a local grocery store, but you can also order them here. The larger floats were cut from Neapolitan coconut candy bars made by Candy Farm. I found them at Hallmark of all places, but you can order them online here. I used blue food coloring spray (available at most grocery stores or bake shops) for the water.
- The Chocolate Swamp was made from a variety of items: chocolate sprinkles, chocolate chips, large Reese’s peanut butter cups, and small peanut butter cups. I used a large round piping tip to pipe chocolate frosting onto the peanut butter cups. I added candy eyes to make the monster.
- The candy castle was created using ice cream cones, plain buttercream frosting, sprinkles, and white rock candy. I cut each ice cream cone in half and piped a large amount of frosting onto each piece using an 1M tip. I placed the pieces of the “castle” onto the cake and covered in sprinkles. I surrounded everything with white rock candy. You can also add a pink or red M&M to the top of each.
- I cut rectangles out of fondant and piped the name of each “land” using a very small round pastry tip.
I tried to include as much information as I could, but if you have any questions, feel free to contact me! Here are more photos:


Wow…what a creation! Happy 1st birthday Teya! :-)
This is pretty awesome!!
Thank you both! :)
Annie this is awesome!! Now I know what you’ve been up to this summer:)
hi Vicki!!! Yes, I’ve been keeping busy with cakes!
Wow, this cake is awesome! What an unbelievable job!
Thank you, SJ!
BY FAR the best and cleanest and cutest candy land cake I have seen as I search for inspiration for my daughter’s cake I want to make this coming week!!! THANKS!!!
Thank you, Joy! :)
aswome cake
soooo coool love it !!!!!!!!!!!!!!!!!!!!!!!!!!!!!!!!!!!!!!!!!!!!!
Love this! Using your cake as inspiration for our candyland party in two weeks. The step by step is so helpful! Question- can I make this the day before and store it? Or does it have to be made day of? Party starts at 11am so I was hoping to do it the night before. (Also buying premade sheet cake and just decorating)
To answer your question, you can decorate the cake the day before. I worked on mine the night before the party and everything turned out fine. Let me know if you have other questions! Happy baking :)